Looking to build on your bullet journal, or pimp your diary spread? I’ve collated a few ideas, incorporating past posts, adding updates and new ideas for you to try.
Create a simple chart, table or block system to track things – whether it’s daily activity, drinking more water or keeping on top of housework! Use a key to help keep it visually accessible, creating different colours or patterns for different segments of what you’re tracking.
I shared this in a previous post about Bullet Journaling, but as I find it so useful I’m sharing it again! You can adapt this to suit your needs. The page is split into 3 sections: the top 2/3 (roughly) has been made into 2 columns for lists, leaving the bottom section free for notes or important details.
Sometimes it’s nice to have a place for self care and reflection. This is a great space to your imagination and get creative. Here, I’ve created a cherry blossom design, filled with some ideas of little monthly wins.
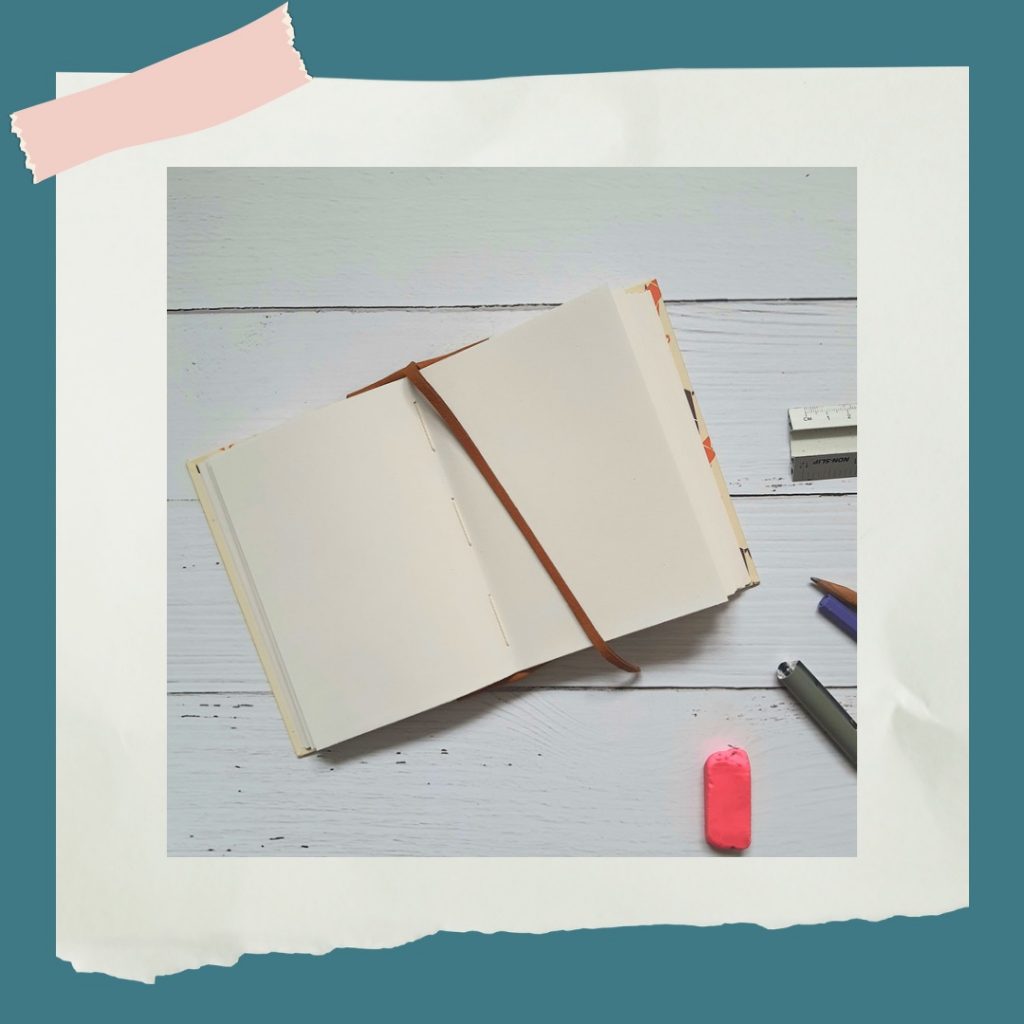
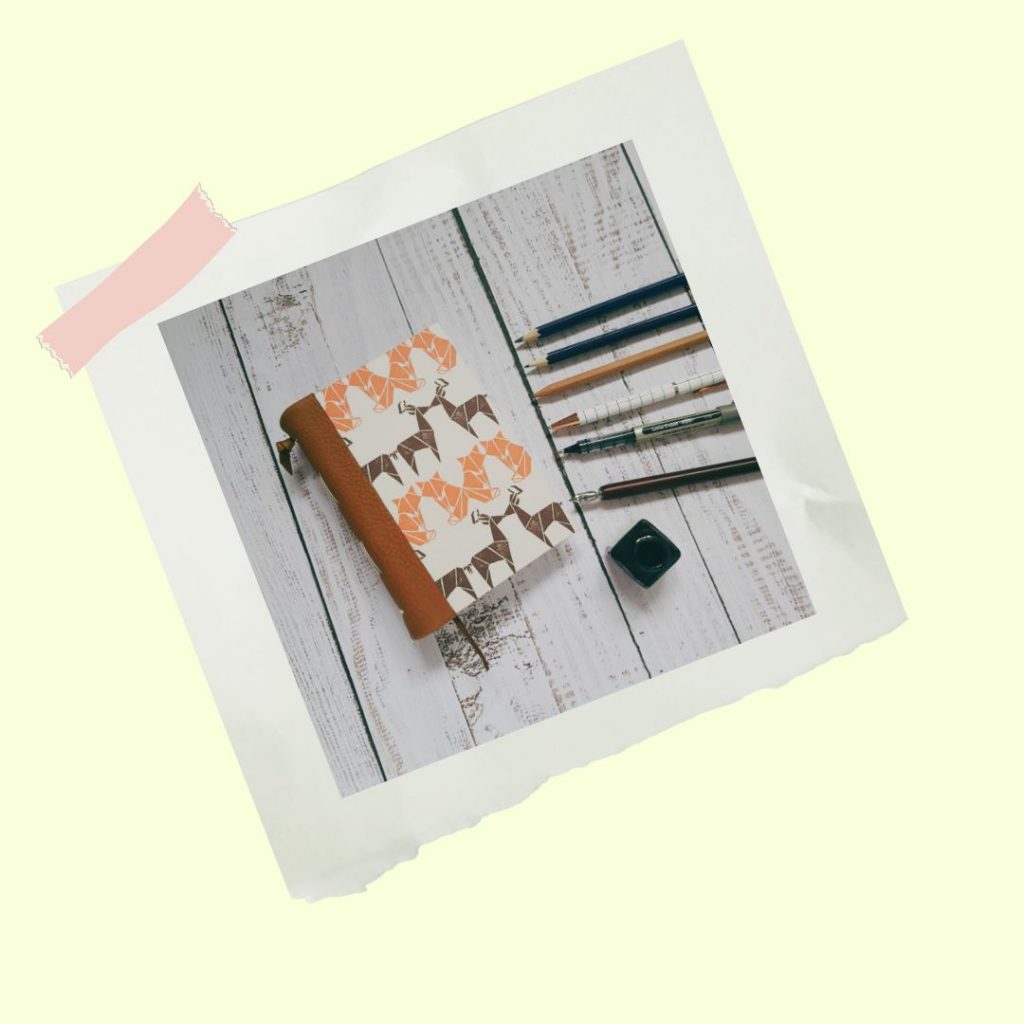
Whether you want to keep a visual diary, or just have somewhere to practice and progress your skills, an art journal is a great addition to your creative journey. In this post, I’ll give you a few ideas to start you off. The first thing you need is a somewhere for your art! My handmade journals have paper suitable for pencils, pens and some paints; if you missed them, you can check out my previous blogs about that here:
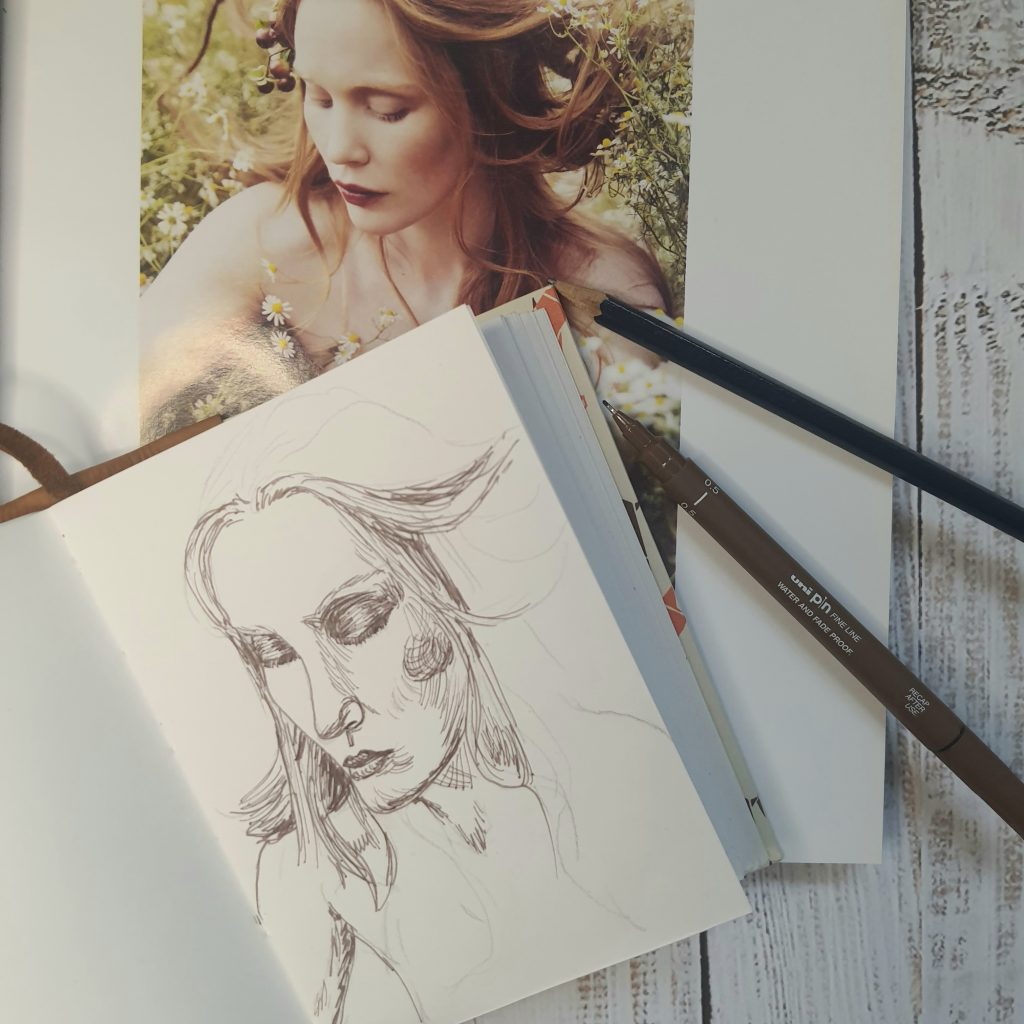
It’s a good idea to start simple, especially if you’re just beginning your art journey (if you’re like me, you won’t draw, paint or write anything on the first page in case something goes wrong 😂). You can often find drawing challenges and prompts online, which can be useful for experimenting with different styles and subjects (Inktober is underway throughout October, with a drawing prompt for every day).
Some ideas could be:
Still life
Nature
People
Abstract or doodles
Below you can find some helpful tips if you just need a bit of inspiration to set your creative juices flowing.
Magazines: flick through until something catches your eye… draw it!
Alternatively, look around you. What is there that you could try to draw or paint? Something with an interesting shape or engaging colours? Replicate it, or break it into basic shapes for a more abstract look.
Wanting to build on your skills? Setting a goal can be a good way to stay on track (one of mine is get better at drawing hands). Dedicate a whole page to practicing one thing.
Some other ideas: daily sketches, details, different styles, different mediums. Experiment! Doodle! Date your work and look back on your progress. Most of all, don’t be afraid to make mistakes. Perfection is overrated 😉
So, you’ve got a blank-paged journal and would like to use it as a diary… what do you do? Where do you start? All those empty pages can feel quite daunting!
I’ve put together a quick guide with some ideas to help you out.
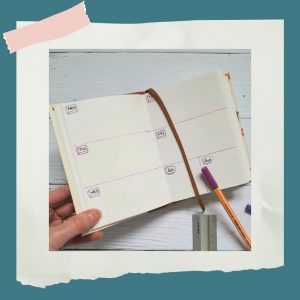
If you’re looking to turn your blank journal into a diary, you’ll need to make sure you’ve got enough pages to last the year. My journals are 128 pages (sides) – here’s an idea of how you could use them.
If you create weekly spreads and do each one over 2 pages, it would make up 104 of the pages (see above image, created in an A6 journal). You could then allocate 1 page per month for a monthly spread, creating it at the start of each set of weeks.
You’ll need more weeks in some months; if you have each monthly layout on a right-hand page, the the next 4 or 5 sets of double pages can be weekly spreads for that month (you’d then end up with a spare blank left-hand page, opposite the next month).
To do the monthly layout, start with a 7×5 grid (days of the week x weeks in the month; it’s easiest to do 5 weeks for all months, because of how the dates fall).
For an A6 journal, make the grid from squares that are roughly 1.5 x 1.5 cm; for A5 they can be around 2 x 2 cm (it might be a good idea to make a template to copy/trace every month). Write the days above the grid, then add the dates in the boxes.
Add a title for the month at the top of the page, as fancy as you like – make it into a banner, flag, or decorate the word. Here are some ideas:
That’s the main structure taken care of… what else will you need? Maybe a title page at the start, or a couple of pages for a yearly outlook? A page to list birthdays/important dates? You could have ideas/note pages each month, or have a few blank pages at the end for jotting things down.
You can create your diary however you want, with whatever pages you’d like to add, but hopefully I’ve given you some ideas for a way to start it off.
Happy journaling!
Don’t forget, you can shop my range of blank handmade journals and notebooks in my Etsy shop 👇
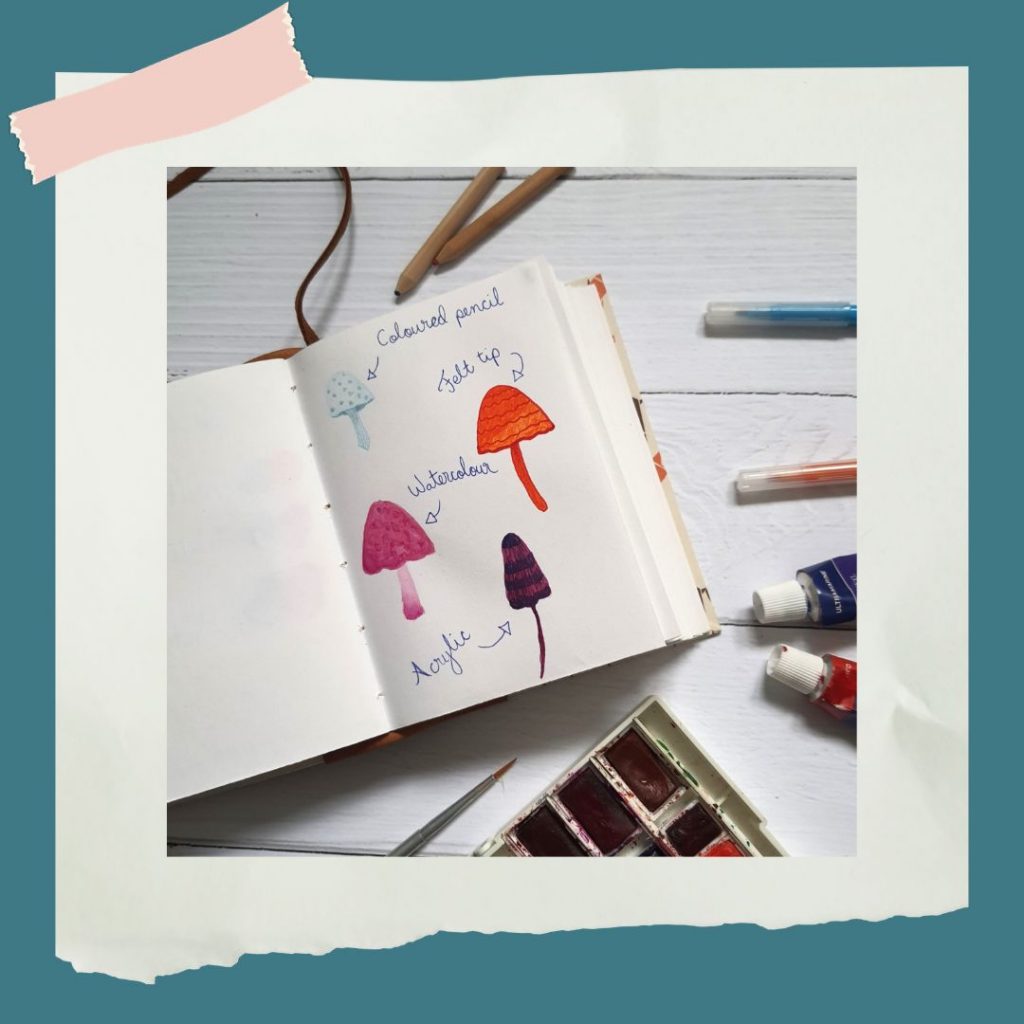
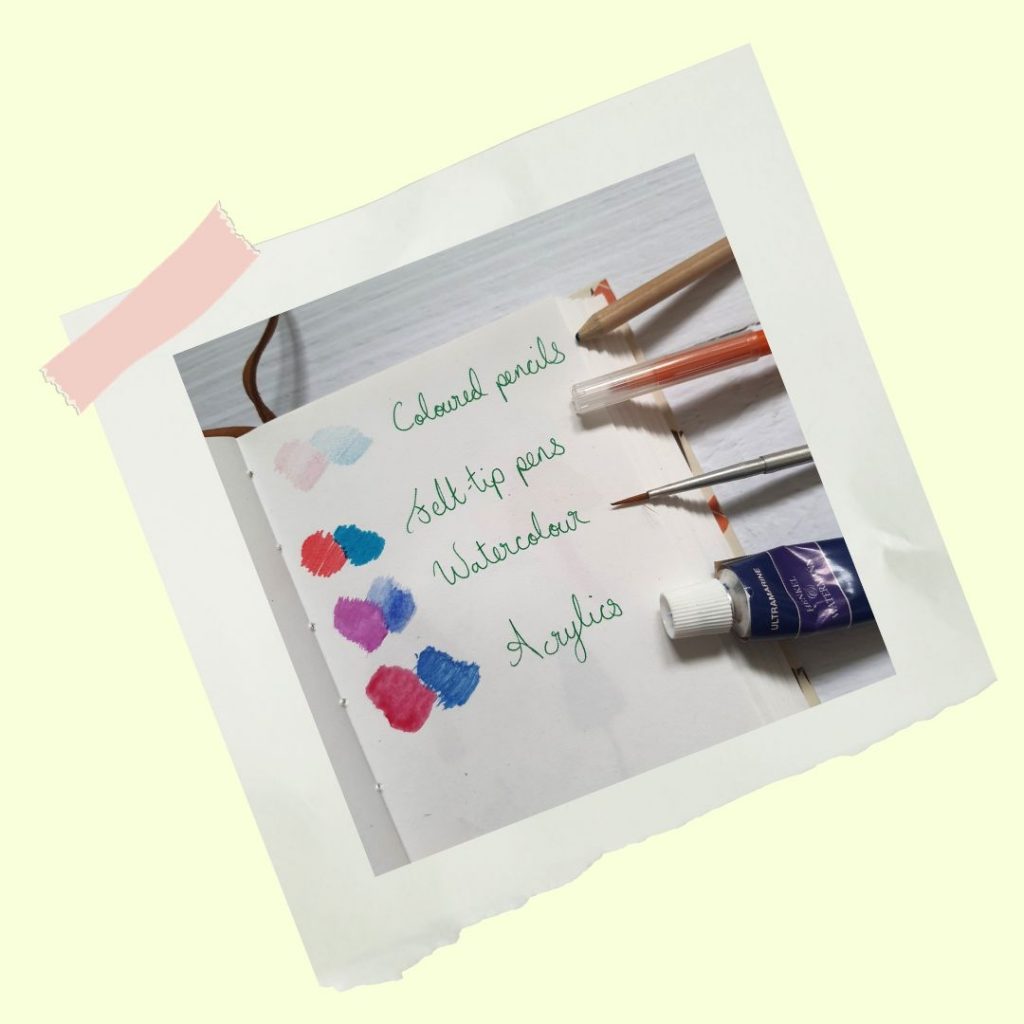
Do you want to use your journal for painting or colouring? Will the paper take it ok? Well, it does depend on the paper type; but generally, if you’re buying a quality handmade notebook, it should take some form of paints. I’ve chosen a few things here for adding colour, including coloured pencils and felt tip pens – just to cover different options!
As mentioned in the pencils/pens write up (which you can find here) the paper in my journals is 140gsm cartridge paper; it will take paints and inks, but some better than others. Ideally for watercolour, you need proper watercolour paper; however, if you’re just starting out or experimenting, the sturdy paper in my journals is fine for testing things out.
Coloured pencils are readily available and easy to use. You can create more in the way of shading and texture with coloured pencils, simply by pressing harder for a darker tone. You should be able to work quickly and easily with pencils, starting light and building up colour where needed.
Felt/fibre-tip pens are nice and bold and bright, creating clean defined lines. While you can’t shade with them as you can with pencils, you can create a graduated effect by overlapping colours slightly with swift, light strokes. Issues? Leave the pen on the paper too long and it’ll bleed through. You can easily write or draw with pens too, making them more versatile.
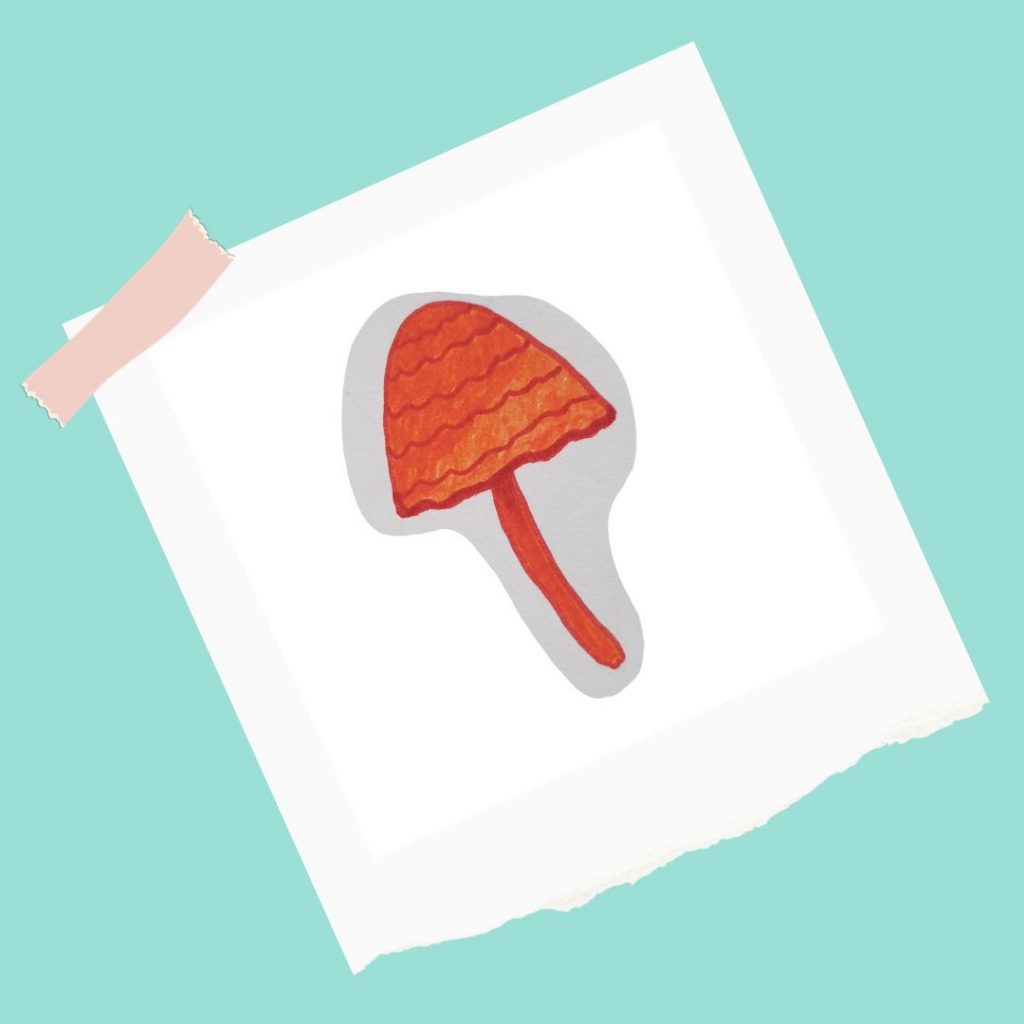
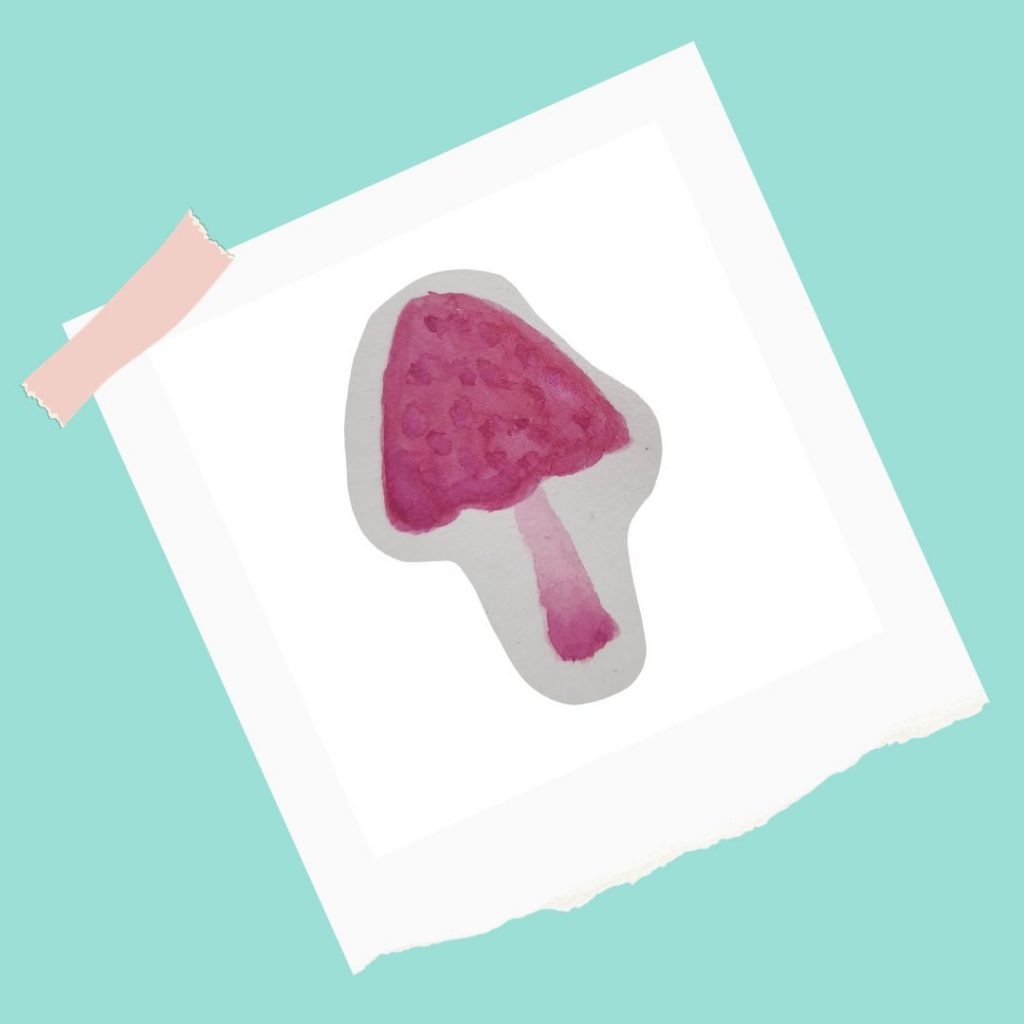
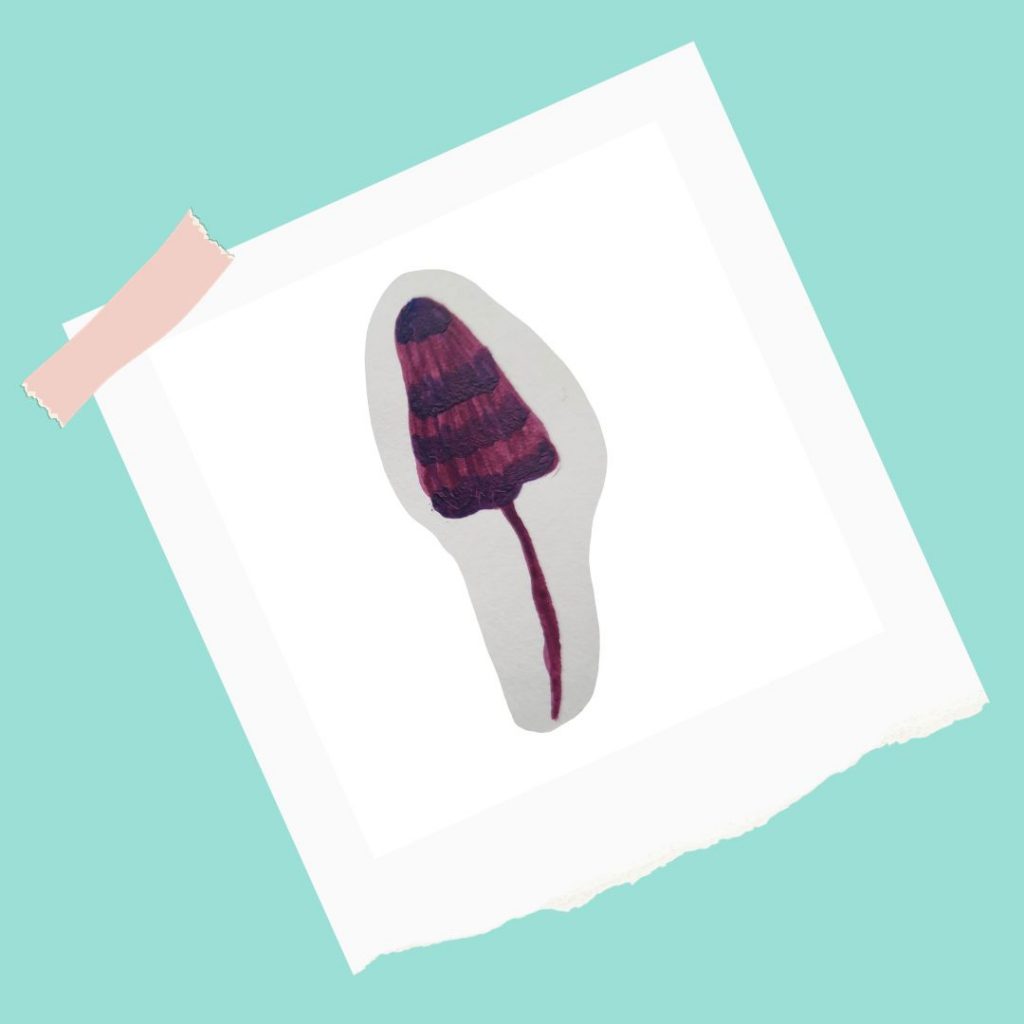
You can create simple watercolours quite easily. Start with the lighter colours and build up to the darker washes. Blend/merge colours using wet on wet paint; for more defined areas, you’ll need to wait for the previous layer to dry. The paper may buckle slightly, but will warp if you get it too wet. You can place a scrap piece of paper or card under the page you’re working on.
As with watercolours, you can get heavier paper to use with acrylics, but the paper I use is great for a mixed media art journal. Acrylic paints are easy to just pick up and use. They’re quick drying and, once dry, you can easily paint over the previous layer. You can thin them with water.
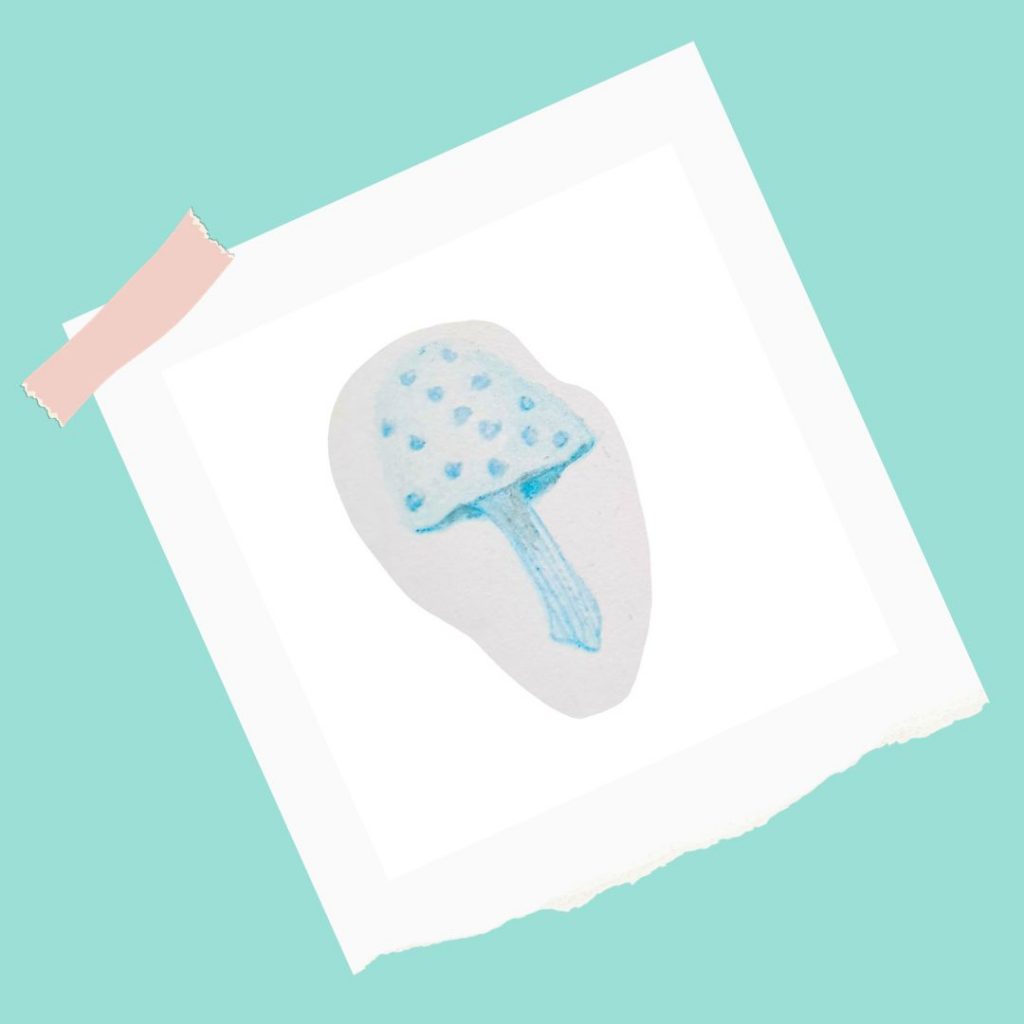
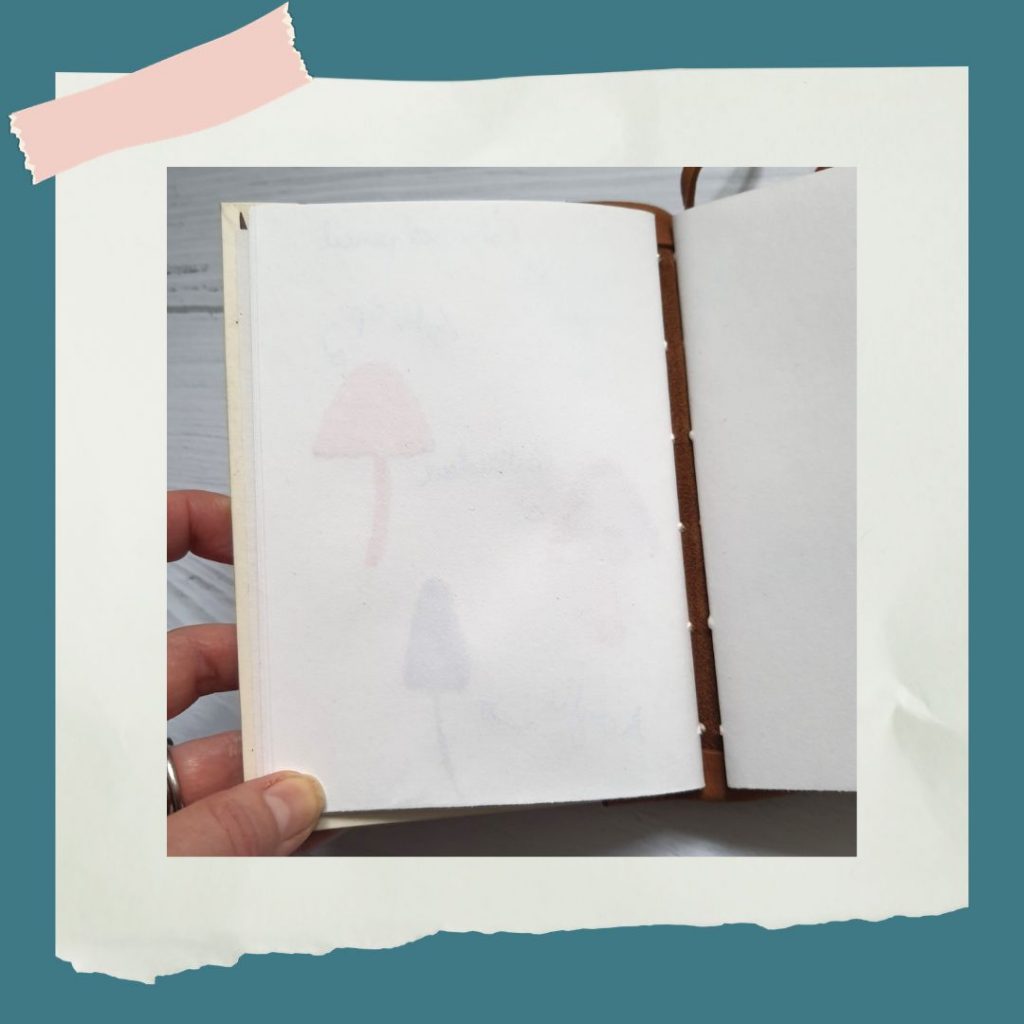
Here you can see the other side of the paper from the mushroom drawings – it shows how much you can see the colours on the other side, and how much the paper warps. If you’re using watercolour or acrylics, I’d suggest not using paints on the other side of the page, but pencils should be ok to use.
Head to my Etsy shop for handmade blank journals and notebooks.
Hi 👋🏻 Thought I’d do a quick little re-introduction for anyway finding me for the first time.
Firstly, thanks so much for being here! I’m Jenni, Captain of The Craft Fantastic; I run a small business from my home in Northampton making journals, notebooks, stationery cases and bookish things by hand – often using leather rescued from shoe factories and furniture.
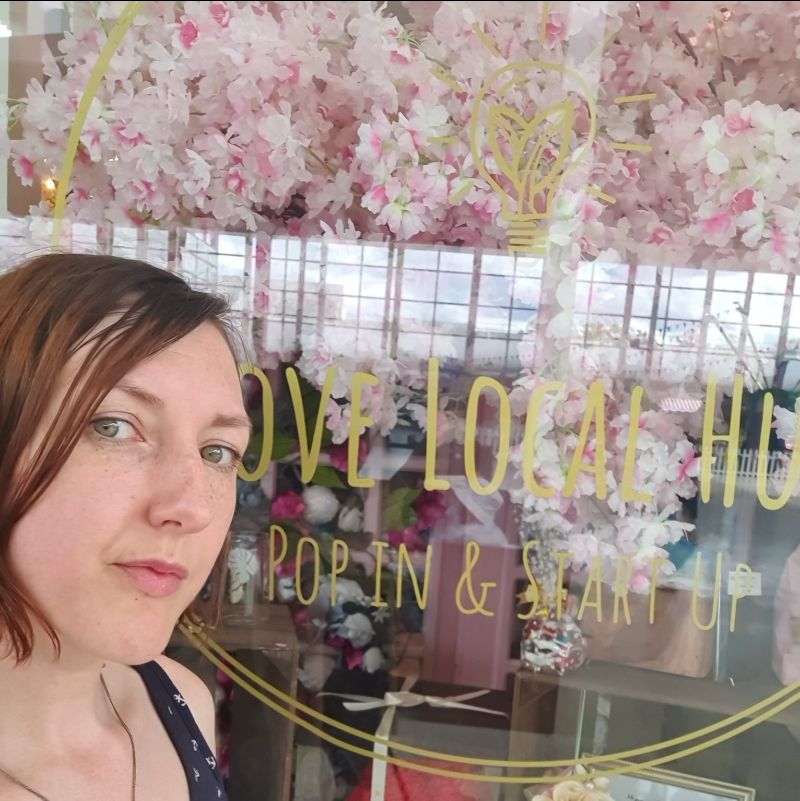
An update about my local stockists:
I’ll no longer be selling at The Emporium in Wellingborough.
You can still shop my range at Margo & Evie and the gift shop at Northampton Shoe Museum…
Plus, you can currently find me in a pop-up space at Love Local Hub in Centre MK!
Don’t live in the Northamptonshire area? Don’t worry; you can find me on Etsy.
Dates for your diary:
Sun 17th September – Made in Northants fair at Northampton Active, Bedford Road, 11am-3pm
Sat 25th November – Meet The Makers Merry Market at St Matthew’s Church Rooms, Northampton, 11am-5pm
⭐️ COMING SOON ⭐️ Part 2 of using your handmade journals. Next up I’ll be looking at using colour 🌈
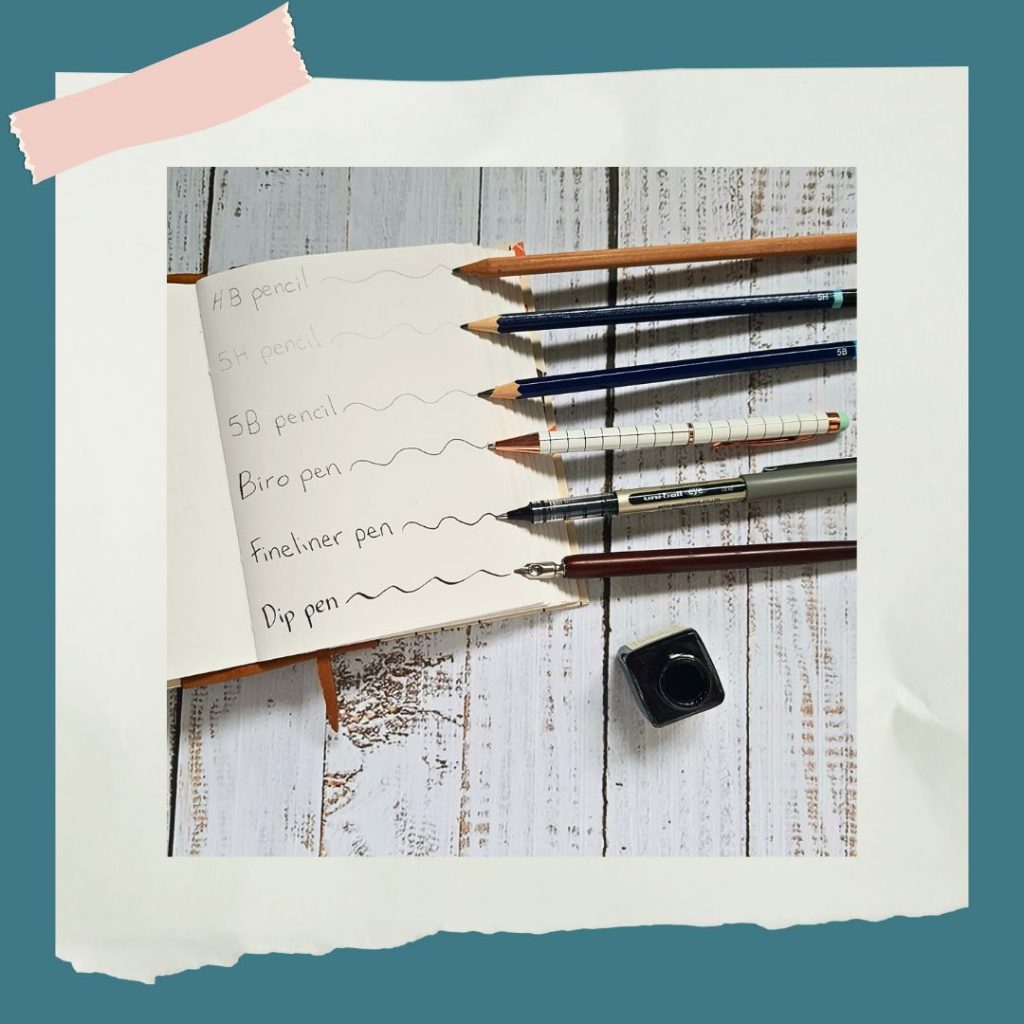
Should you use pen or pencil for journaling? What’s best to use in your notebook? Whether you want to use your blank pages for writing or drawing, it’s nice to know how your pens and pencils will work with the paper. Let’s take a look, shall we?
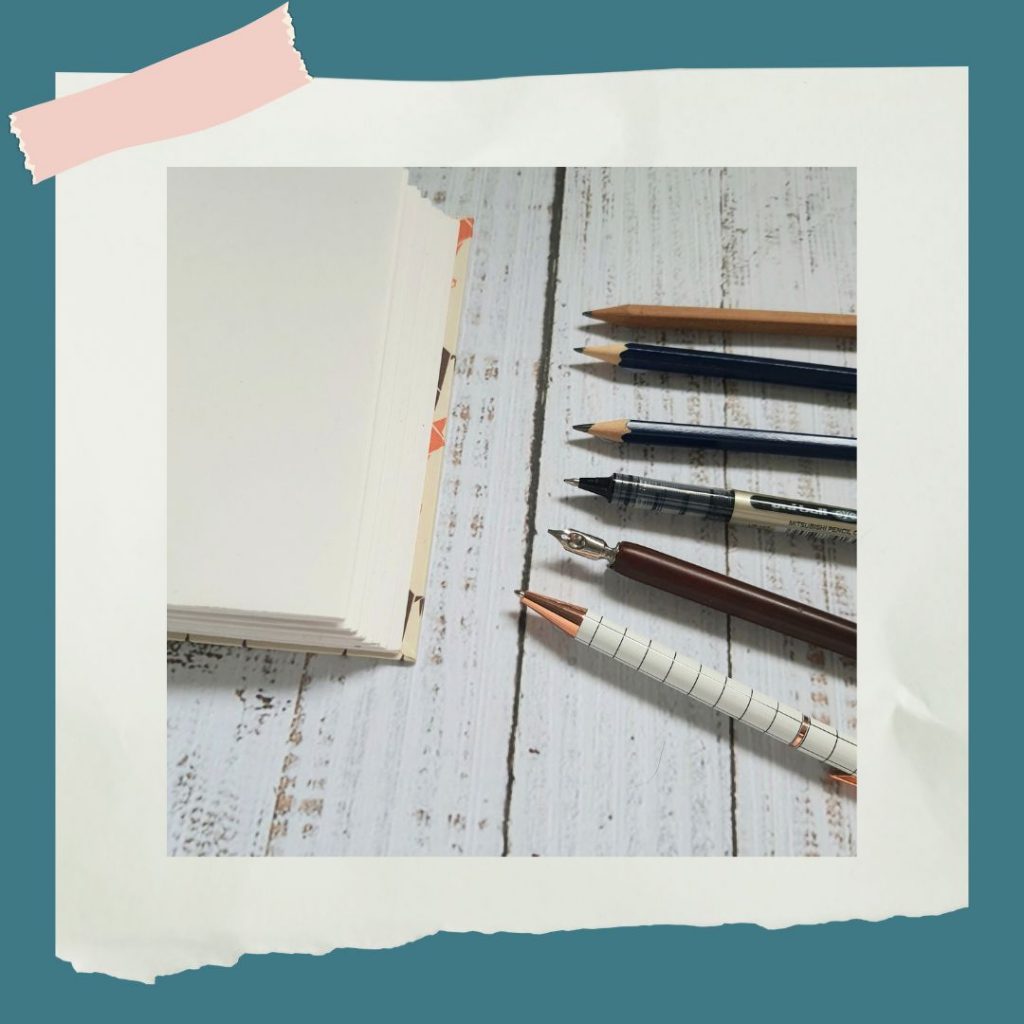
The paper used in my journals is 140gsm cartridge paper (it’s been made using upcycled takeaway cups!). This paper is quite sturdy and will take different mediums; pens and pencils, and also some paints (more on that another time). Here, I’ll be looking at some of the different pencils and pens you might be using for writing or drawing in your journal – you’ll be able to see what each of them look like on paper.
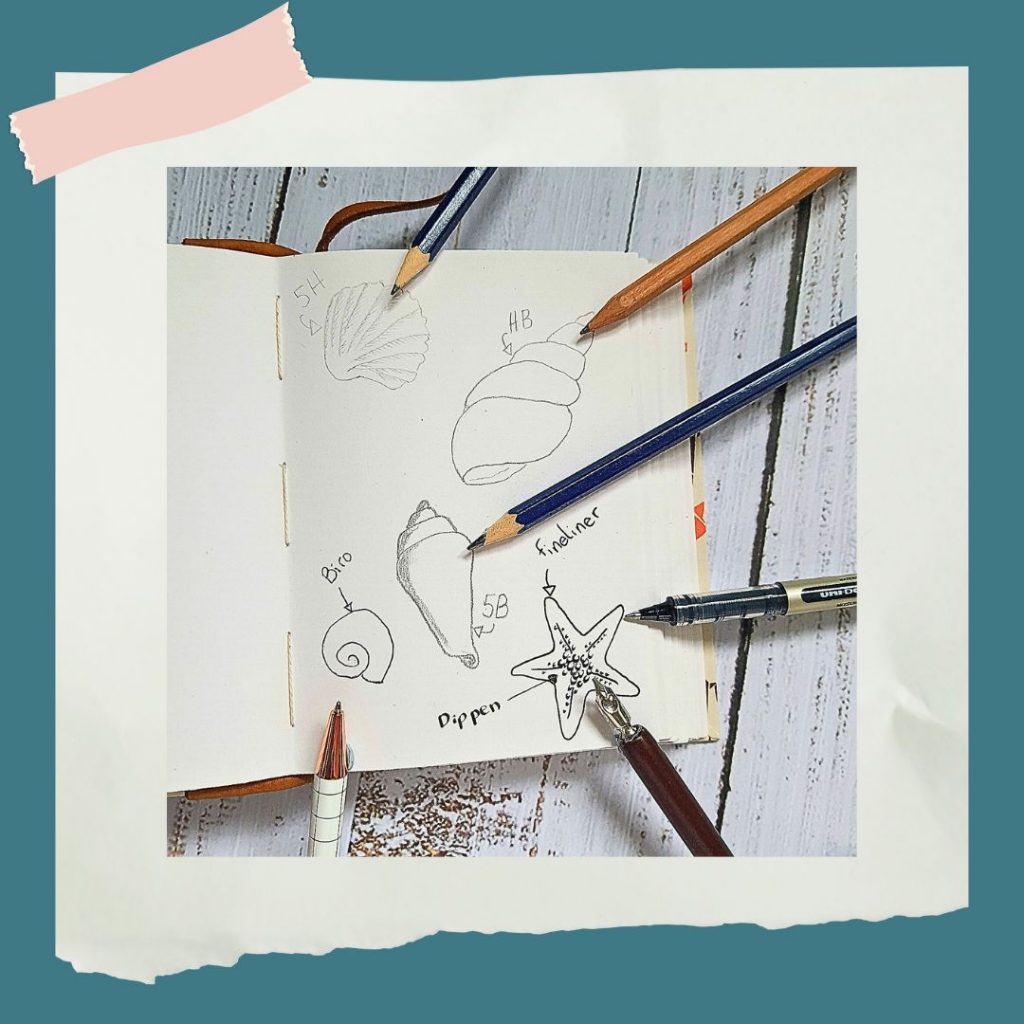
Ever wondered what the letters and numbers on pencils mean? Generally, HB is your bog-standard pencil: H = hard, B = blackness. You can get various grades of H & B pencils. With H pencils, the higher the number the harder the pencil, creating a harder, lighter line. When it comes to B, the higher the number the softer the pencil, creating a softer, darker line. While you normally associate pens with writing, you can use them for drawing too. There are loads of different types of pens; I’ve chosen 3 I think fit best with using in journals.
So, what difference does this all make when it comes to drawing and writing? Here are some simple doodles to give you an idea:
Use H to create hard, clean lines. The fact that they produce lighter, more precise lines makes them good for writing and technical drawings.
B pencils can be used for sketching and adding texture. Because they’re soft, they can be more expressive; it also makes them easier to rub out!
Biros (or ballpoint pens) are best for writing – great for everyday journaling. But you can doodle with them too!
Fineliners are perfect for journaling; you can use them for writing, drawing or doing your layouts.
Dip pens are just that – pens that you dip… into a pot of ink! They’re often used for calligraphy, but you can use them for sketches, too. Using the different angles of the nib means you can create various line widths and strengths. They can take a while to get used to, but are very satisfying to use once you’ve got the hang of it.
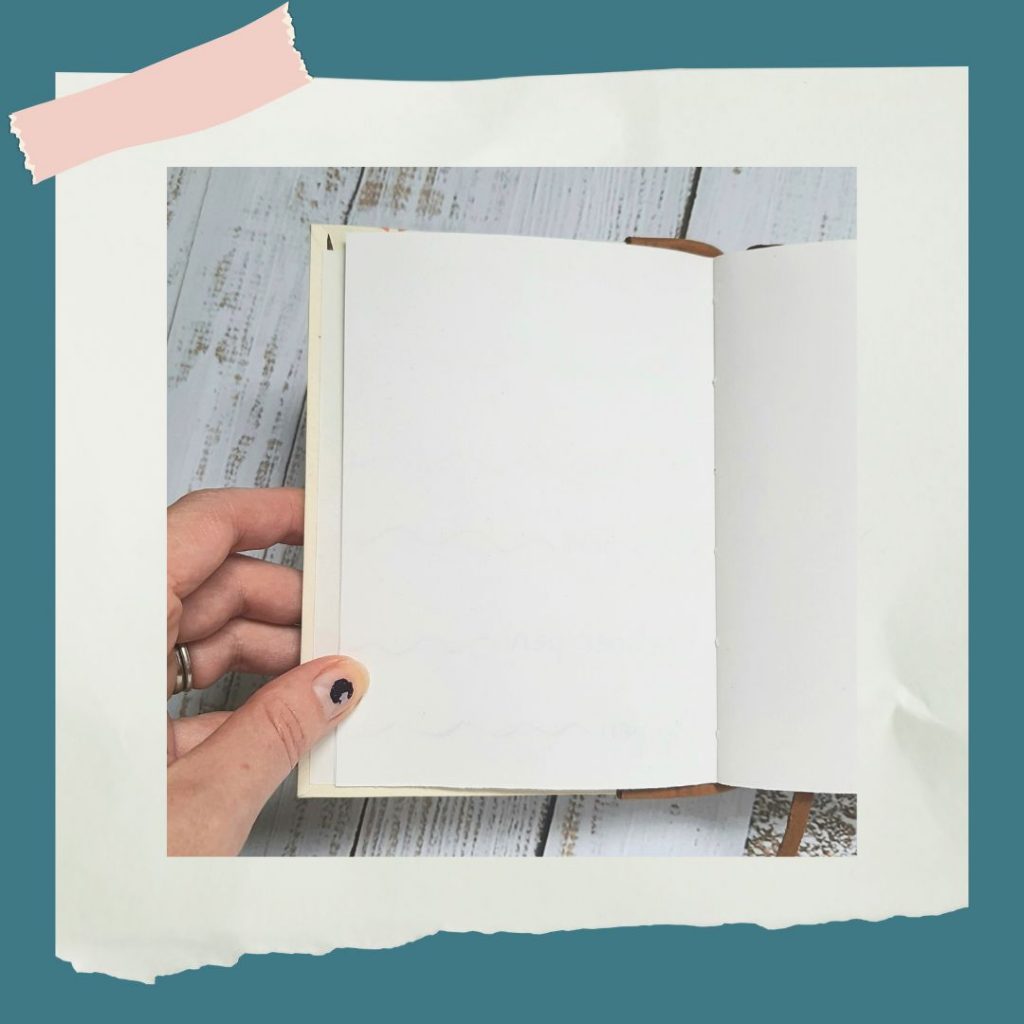
What else would you want to know about the paper quality of a journal or notebook? How about how much it shows through to the other side? As you can see, with the paper I use in my handmade journals, you can hardly see the pencil, while the dip pen and fineliner show through the most.
If, like me, the best thing about going back to school was shopping for stationery, then rejoice! May 16th-22nd is National Stationery Week! Yes, really – well, they have National days & weeks for everything, why not stationery? Because stationery is awesome.
My Etsy customers are the best! Reviews like this make my day.
Launched back in 2012 by the Stationery Show, it started life as just a day, gaining momentum and building into a full week. It’s used to celebrate the joys of writing by hand; whether you’re writing in your own notebook, sending someone a letter or postcard, or just a quick note to stick on the fridge.
What’s your style when it comes to stationery? Understated? OTT? Cute & colourful? Plain & simple? I love the fact that you can get stationery in so many different styles to match your mood or personality.
Making from waste materials means I’m kept on my toes a bit in terms of what I can make in what size, but it means it never gets boring! These pencil cases were made from leather from a furniture samples booklet, and would’ve otherwise been thrown away. Find a selection in my Etsy shop.
Favourite stationery brands
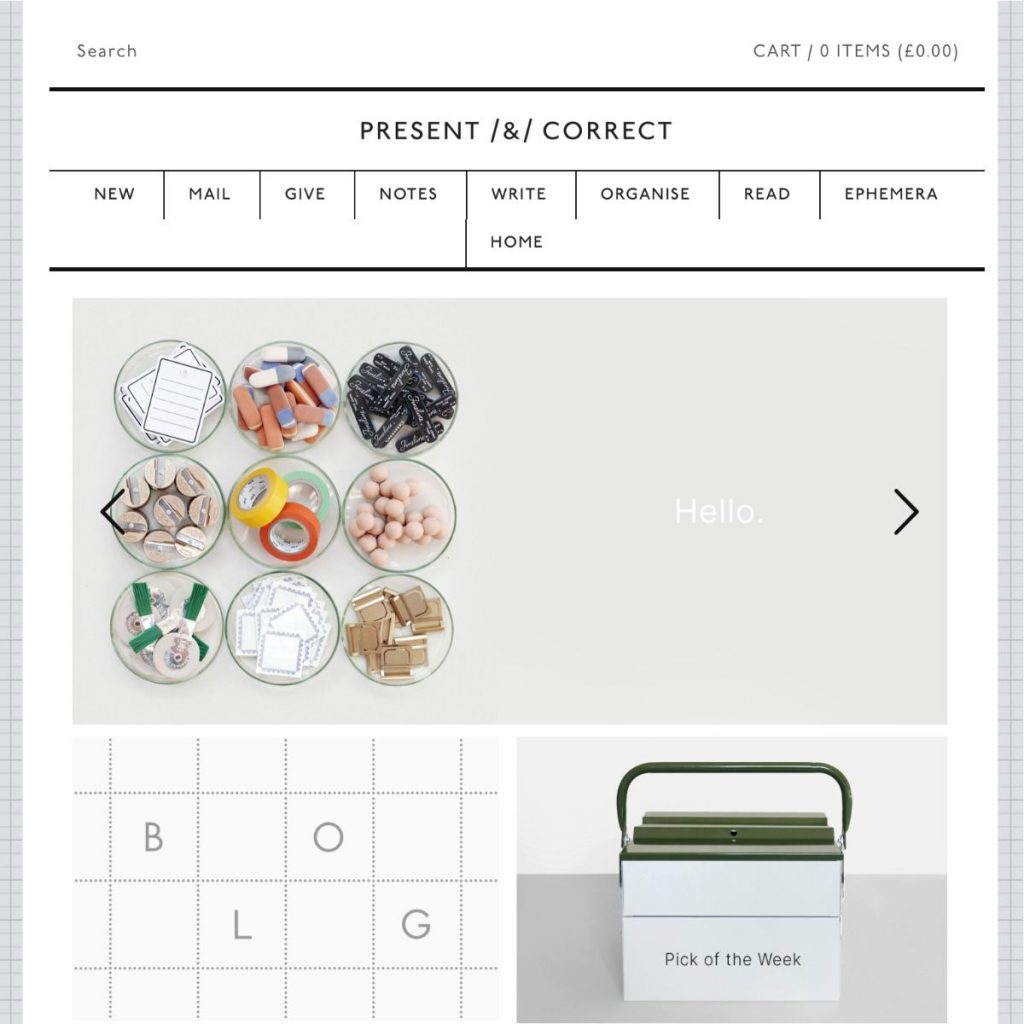
When it comes to looking at stationery shops online, my favourite is Present and Correct. The whole look of their website is just *chef kiss*; every detail is a stationery lover’s dream, down to the graph paper backgrounds. I highly recommend checking out their Ephemera section – all those things you need without really knowing why. They do have a physical store too, in London, though I’m yet to check it out.Do you have a favourite pen? I’ve got a set from Kikki.k that I use all time, I love them! Think simple pastel sets and stationery essentials from this Swedish brand. While they currently don’t have UK stores anymore, you can still peruse their online shop for inspiration.
Hands up if you love stationery. Me too. So let’s not waste any more time with this section and get right to it!
Do you use washi tape? I absolutely LOVE it. So versatile, so pretty and so practical – you can use it for journaling, wrapping, decorating notebook covers… plus it’s made from natural fibres, so can be recycled. Winner! Joanne Hawker has just added her own designs of washi tape on her website and, like the rest of her range, it is just delightful.
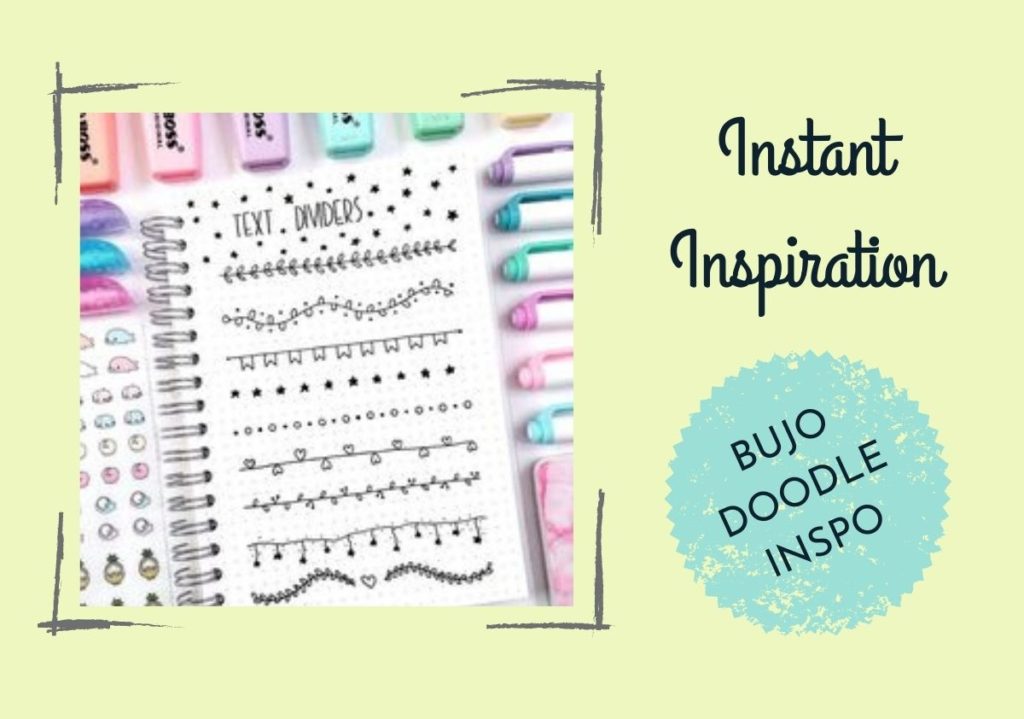
Have you heard of bullet journaling? Is it still a thing? What even is it? Well, it’s primarily a type of diary-journal-planner, most often done on dotted paper or something that helps create sections, bullet points, trackers etc. The more ambitious use plain paper journals and create their own grids & patterns. People use them for well-being, tracking habits, or just general planning. Personally I think half the fun is customising and decorating the pages! Here are some ideas for if you’re just starting out, and some more adventurous ones.
Did you catch my last blog? Take a look through these 5 signs you’re a stationery addict. From hoarding notebooks to not using pencils because they’re too nice; how many of these do you identify with?
Ah, stationery, how do I love thee? Let me count the ways. You’re fun/cute/sensible/useful/organised/practical to name a few. There’s just something super satisfying about having a brand new set of pencils. How many of the below statements sound familiar to you?
You have a set of pencils that you’ve never used because that would spoil them. Same goes for all those adorably cute erasers you’ve amassed over the years.
SHARPEN them? You MONSTER.
You categorise your pens like Monica from Friends categorises her hand towels. Personal, everyday, fancy, guest…
No, you may NOT use my diary pen to do the crossword.
Notebooks: don’t EVEN get you started. You must have them all. Because you need one for lists, one for doodles, one for neat, one for writing up the neat one when you inevitably make a mistake…
A desk tidy with enough compartments and drawers to hold everything is just THE most delightful thing in the world. (But of course it still doesn’t hold everything and you have pots of pens, pencils, rulers, scissors etc. everywhere.) Same goes: pencil cases.
I still dream of owning one of these.
Even though you do use the diary and calendar on your phone, an event is not happening unless you’ve physically written it in your real diary.
You can shop a range of handmade stationery on Etsy, or learn more about what I do on my website.
Do you find your creative clutter soon gets out of hand? Being a maker myself, I have lots of different tools and materials and I need them all within reach; which quickly leads to having stuff everywhere. I have found a few things that help, though, so I thought I’d share them with you.
Recycling or rubbish? I’ve got a bin for both. I end up with lots of scraps of paper and keep them all together to recycle, or for turning into handmade paper (a constant future project).
Upcycle and repurpose. Got an old chipped mug? Use it to keep your pens and pencils in. If you’re like me and have LOTS, you can keep a particular collection in each mug; felt pens in one, fine liners in another etc. You know those little glass pots you get delicious desserts in? They are GREAT for keeping small bits and pieces in.
Make the most of desk tidies. A purpose-built desk tidy has plenty of room for larger items and can happily accommodate your bulkier stationery. These wooden houses are the perfect home for big brushes, scissors and chunky pens.
Store your bits & bobs. A shallow tray or dish is the perfect place for anything that you need to hand, but that’s too small for a tall holder. Use them so you’ve got easy access to things like pencil sharpers and rubbers, or any small bits of string/wool/beads that may usually accumulate on your desk.
Stash your stationery. If there are things you need tidied away, the classic pencil case is the way to go. They’ll keep all your creative tools tucked away until you need them.
Hope these hints and tips have helped to get you a bit more organised! What are your top tips for staying on top of creative clutter?
Find my full range of handmade stationery in my Etsy shop.