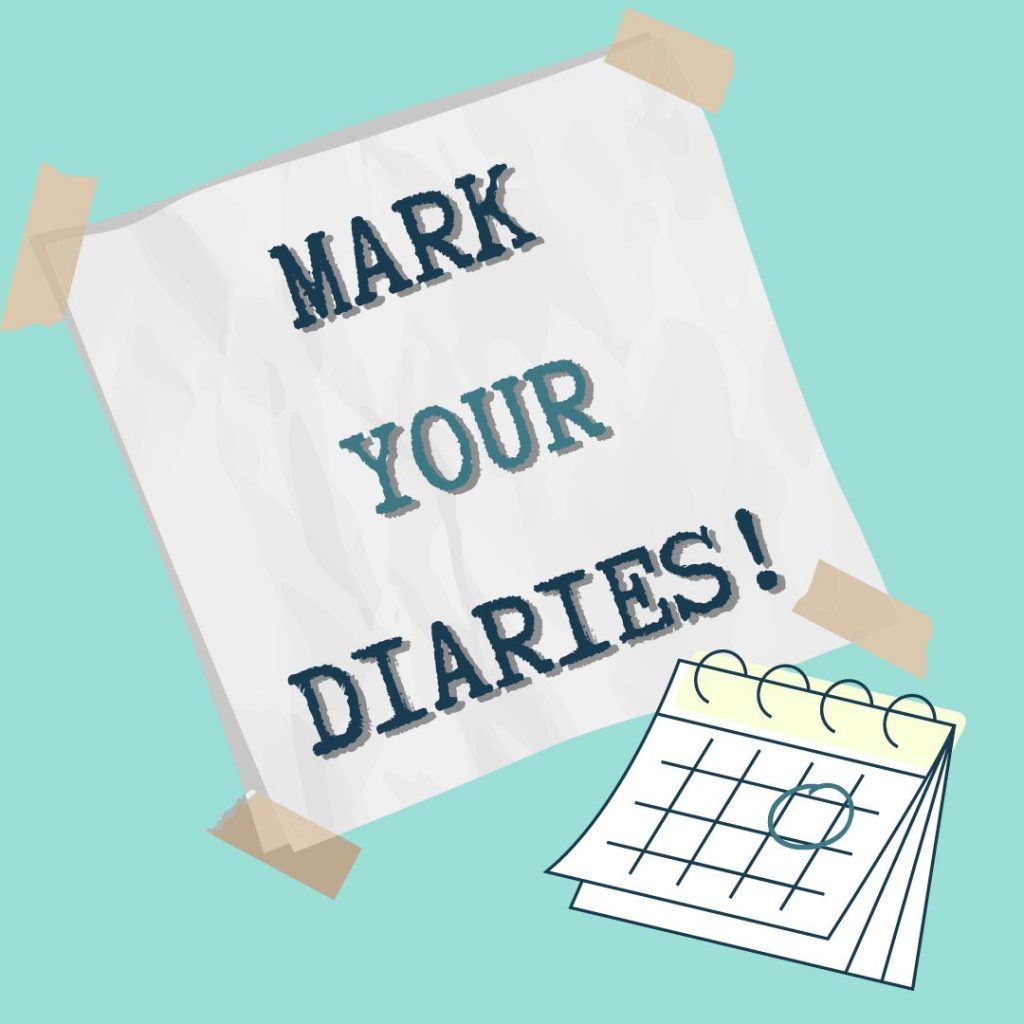
Join me at a local fair in Northamptonshire, or come along to a workshop and make something for yourself. I’ve got a few dates in the diary – check them out below 👇
Don’t forget you can shop with me online if you can’t get out and about to any of these events.
I’m running a few workshops towards the end of the year, including leather journals & festive origami.
I’ve got 3 fairs booked in so far in and around Northamptonshire – including a book extravaganza at the start of October. That one will be the most dangerous in terms of spending money I think 😂
Hi 👋🏻 Thought I’d do a quick little re-introduction for anyway finding me for the first time.
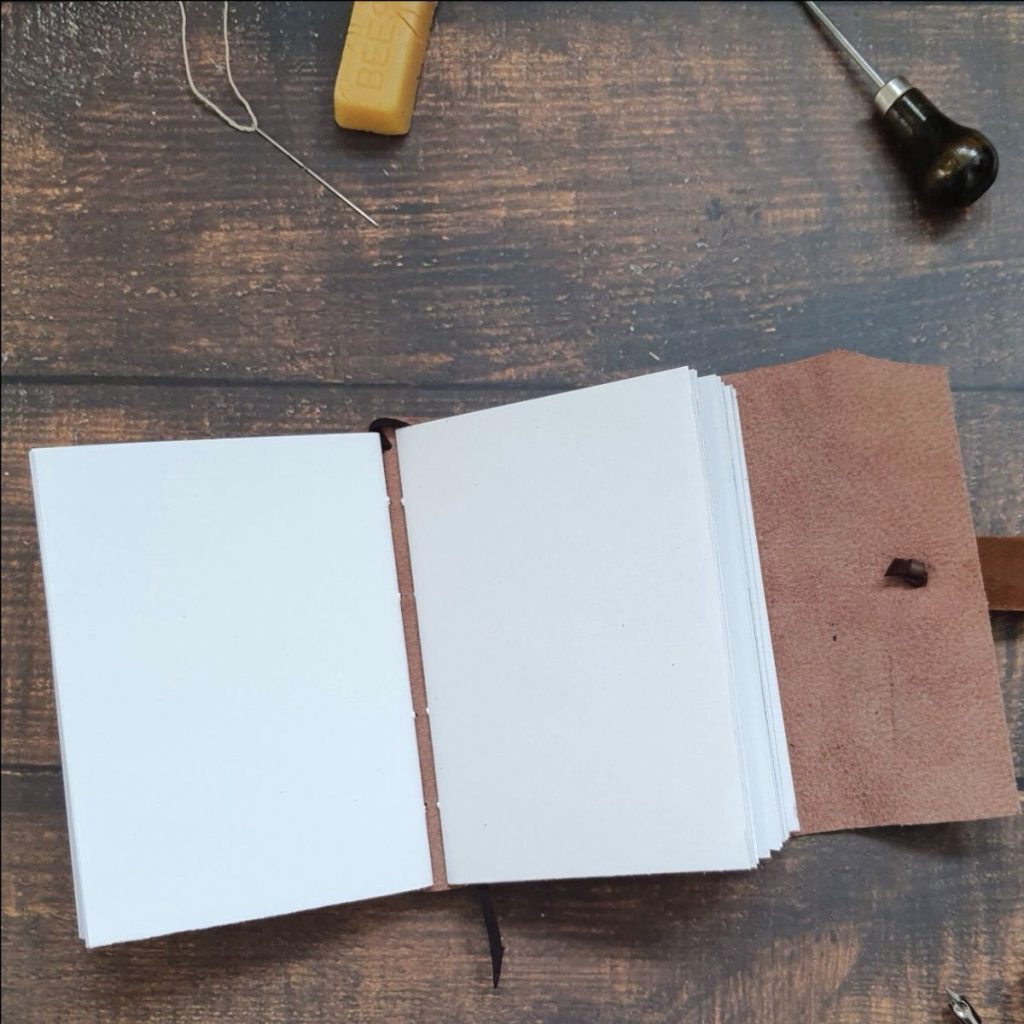
Firstly, thanks so much for being here! I’m Jenni, Captain of The Craft Fantastic; I run a small business from my home in Northampton making journals, notebooks, stationery cases and bookish things by hand – often using leather rescued from shoe factories and furniture.
An update about my local stockists:
I’ll no longer be selling at The Emporium in Wellingborough.
You can still shop my range at Margo & Evie and the gift shop at Northampton Shoe Museum…
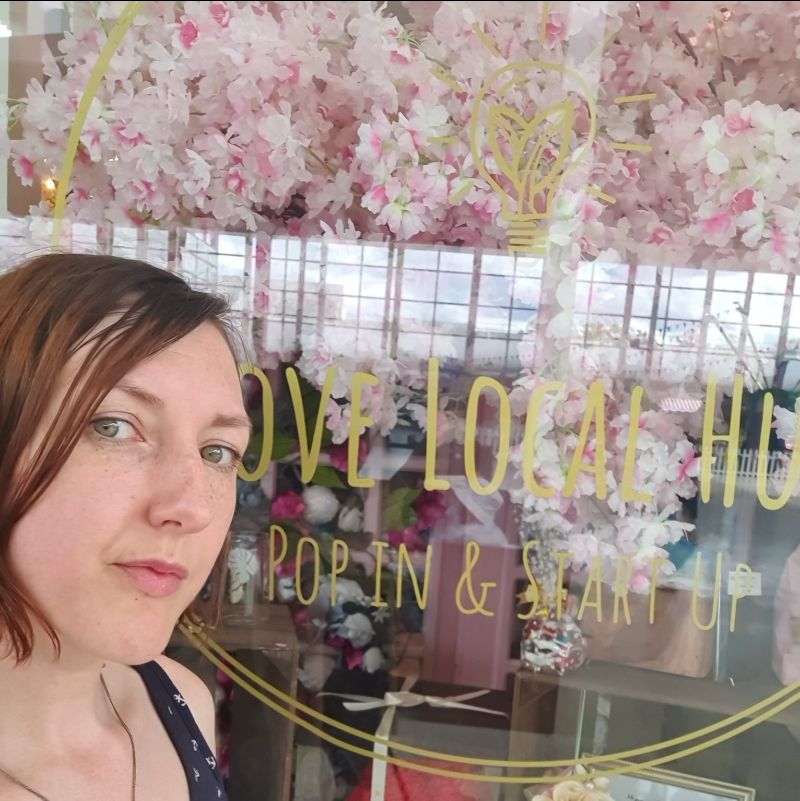
Plus, you can currently find me in a pop-up space at Love Local Hub in Centre MK!
Don’t live in the Northamptonshire area? Don’t worry; you can find me on Etsy.
Dates for your diary:
Sun 17th September – Made in Northants fair at Northampton Active, Bedford Road, 11am-3pm
Sat 25th November – Meet The Makers Merry Market at St Matthew’s Church Rooms, Northampton, 11am-5pm
⭐️ COMING SOON ⭐️ Part 2 of using your handmade journals. Next up I’ll be looking at using colour 🌈
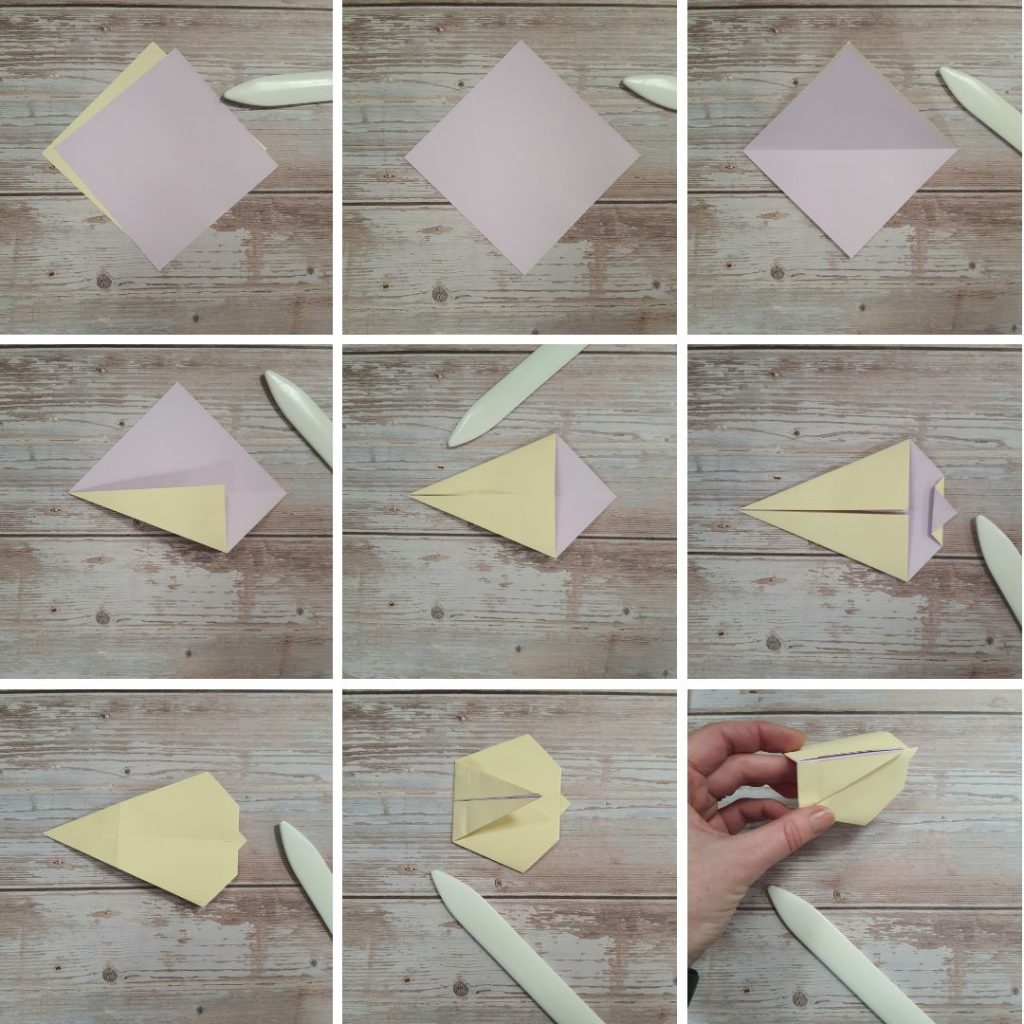
Why not fancy up a gift card by whipping up one of these simple origami card holders?
All you need is a sheet of A4 paper! After every step, remember to check the fold is neat and then crease firmly. If you don’t have a creasing tool, you can use the back of your thumbnail. Ready?
If you’re using paper with a pattern or colour on one side, start with the plain side facing you.
Fold in half (from side to side).
Crease and unfold.
One side at a time, fold the left and right edges in to meet the centre crease, then unfold.
Taking each corner in turn, fold in to meet the crease made in the previous step, until all 4 corners are folded.
Now fold in the left and right edges in to meet in the middle again.
Turn the model over.
Fold in half, top to bottom – crease and unfold.
Take the bottom and fold up to just past the horizontal crease from the last step.
Next, do the same with the top – fold down so it overlaps slightly.
Now you should be able to tuck the top bit you’ve just folded down into the bottom bit…
And we’re done! A standard gift card should fit into one of the pockets, then you can fold it in half ready for gifting – add a ribbon if you’re feeling extra fancy!
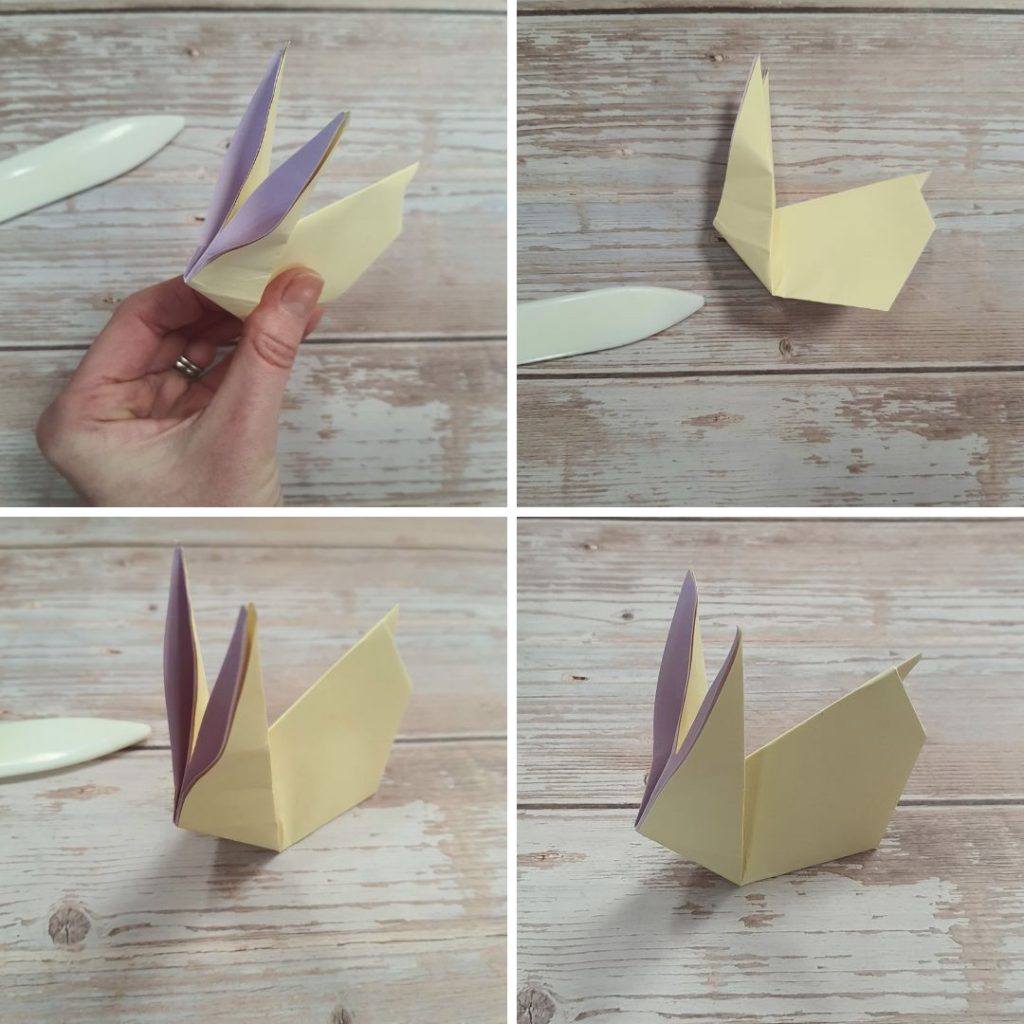
I chose this for my next tutorial as 2023 is the Chinese year of the rabbit! There are lots of origami bunny tutorials; this is one of the simpler ones.
All you really need is some thin squares of paper and a pair of scissors.
If you make this out of double sided paper, the inside of the ears will be a different colour! Not got any? Use two thin sheets of different colours (that’s what I’ve done here).
Don’t forget to fold neatly and crease firmly – you can press the creases with the back of your thumb nail if you don’t have a creasing tool.
If you’re using two-colour paper, start with the colour you want the inside of the ears to be facing upwards.
Start with the paper in a diamond shape, with a corner pointing towards you.
Fold in half from top point to bottom, crease and unfold.
Take the bottom left sloping edge and fold in to meet the centre crease.
Do the same with the top left edge.
Take the right hand point – fold it back to meet the edge you’ve just made, then fold the tip back the other way so it sticks out over the flat edge a bit (this will be the tail!)
Flip the whole thing over.
Fold the left hand point over to the right, so it almost meets the flat edge.
Next, fold the whole thing in half, bringing the centre crease upwards and the edges down towards each other – it’s easier if you pick it up to do this (see last picture).
Now we’re going to make the ears! At the moment, they look like they’re laying along the rabbit’s back.
Hold the bottom of the model in one hand and gently bring the points of the ears up with the other.
Stop when the back of the ears are roughly perpendicular to the base. Crease well.
Ok – so the next step involves separating the ears! Take a pair of scissors and very carefully snip down the centre crease between the ears, being careful not to cut all the way down.
To give the ears a bit more shape – stick your finger in them 😂 You can open them out a bit at the bottom, which will show the contrasting paper (if you’ve used it).
Lastly, lay the model down and go over all the creases on the body one last time.
If, like me, the best thing about going back to school was shopping for stationery, then rejoice! May 16th-22nd is National Stationery Week! Yes, really – well, they have National days & weeks for everything, why not stationery? Because stationery is awesome.
My Etsy customers are the best! Reviews like this make my day.
Launched back in 2012 by the Stationery Show, it started life as just a day, gaining momentum and building into a full week. It’s used to celebrate the joys of writing by hand; whether you’re writing in your own notebook, sending someone a letter or postcard, or just a quick note to stick on the fridge.
What’s your style when it comes to stationery? Understated? OTT? Cute & colourful? Plain & simple? I love the fact that you can get stationery in so many different styles to match your mood or personality.
Making from waste materials means I’m kept on my toes a bit in terms of what I can make in what size, but it means it never gets boring! These pencil cases were made from leather from a furniture samples booklet, and would’ve otherwise been thrown away. Find a selection in my Etsy shop.
Favourite stationery brands
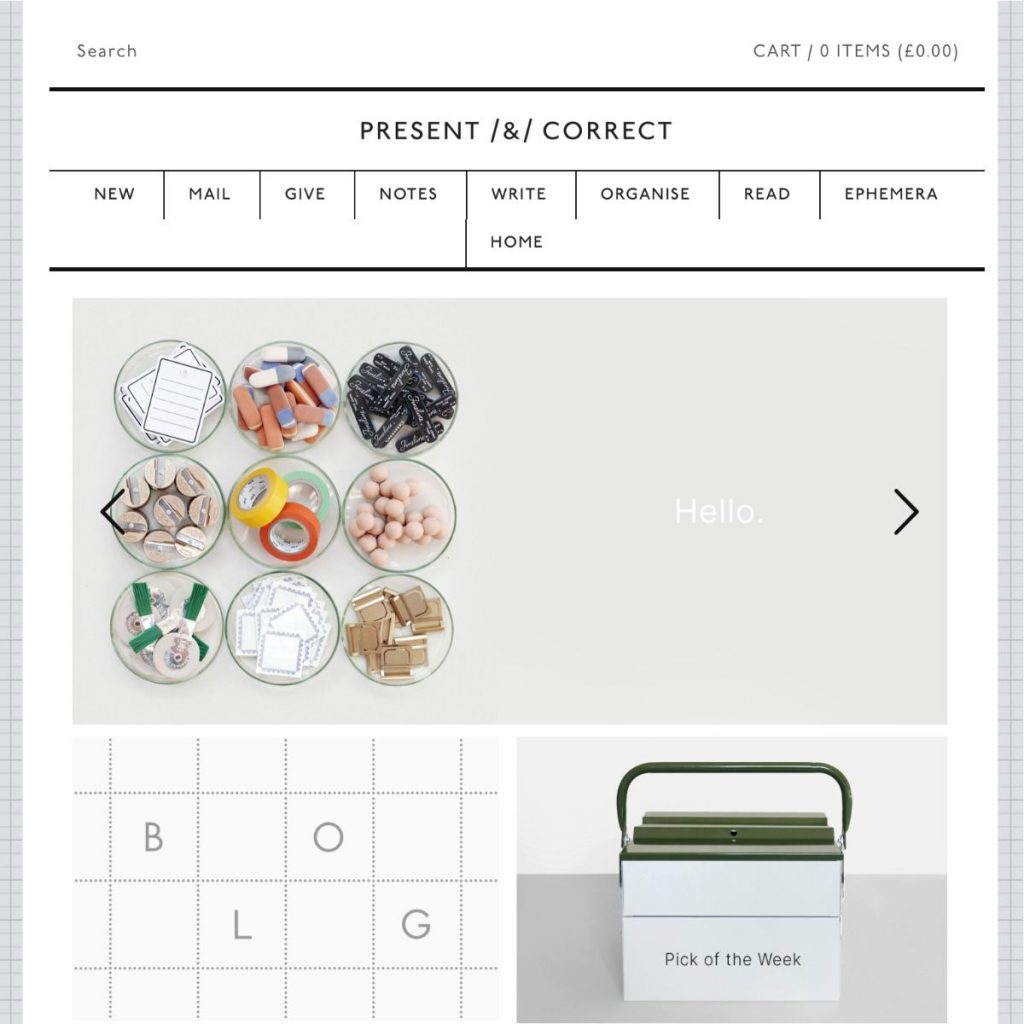
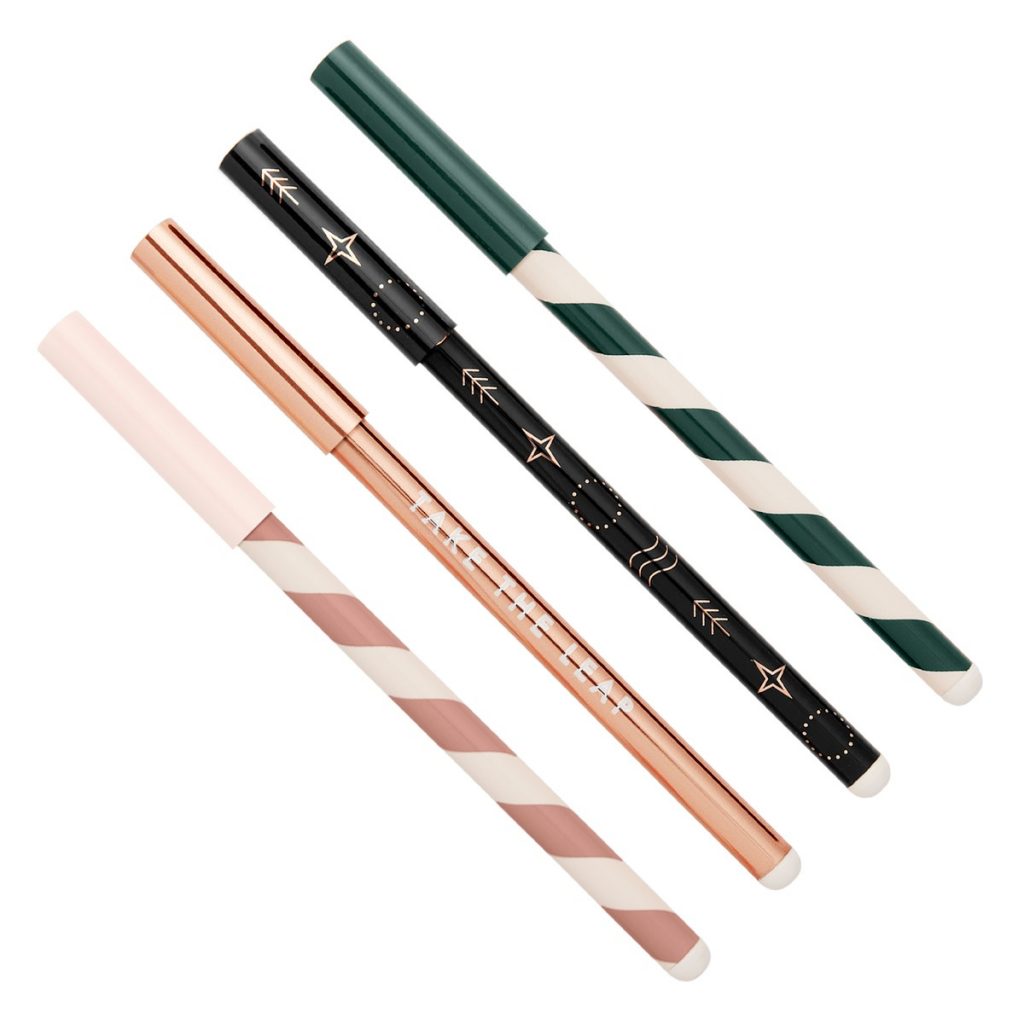
When it comes to looking at stationery shops online, my favourite is Present and Correct. The whole look of their website is just *chef kiss*; every detail is a stationery lover’s dream, down to the graph paper backgrounds. I highly recommend checking out their Ephemera section – all those things you need without really knowing why. They do have a physical store too, in London, though I’m yet to check it out.Do you have a favourite pen? I’ve got a set from Kikki.k that I use all time, I love them! Think simple pastel sets and stationery essentials from this Swedish brand. While they currently don’t have UK stores anymore, you can still peruse their online shop for inspiration.
A warm welcome to followers old and new. I’ve been busy stocking my Etsy shop with lovely rescued leather journals and pencil wraps this month and have created some new labels for my shelf space at The Emporium (a Wellingborough based shop full of handmade awesomeness!) – all my products now have more of a library-esque feel, which I love. But enough about me; let’s just get down to it, shall we?
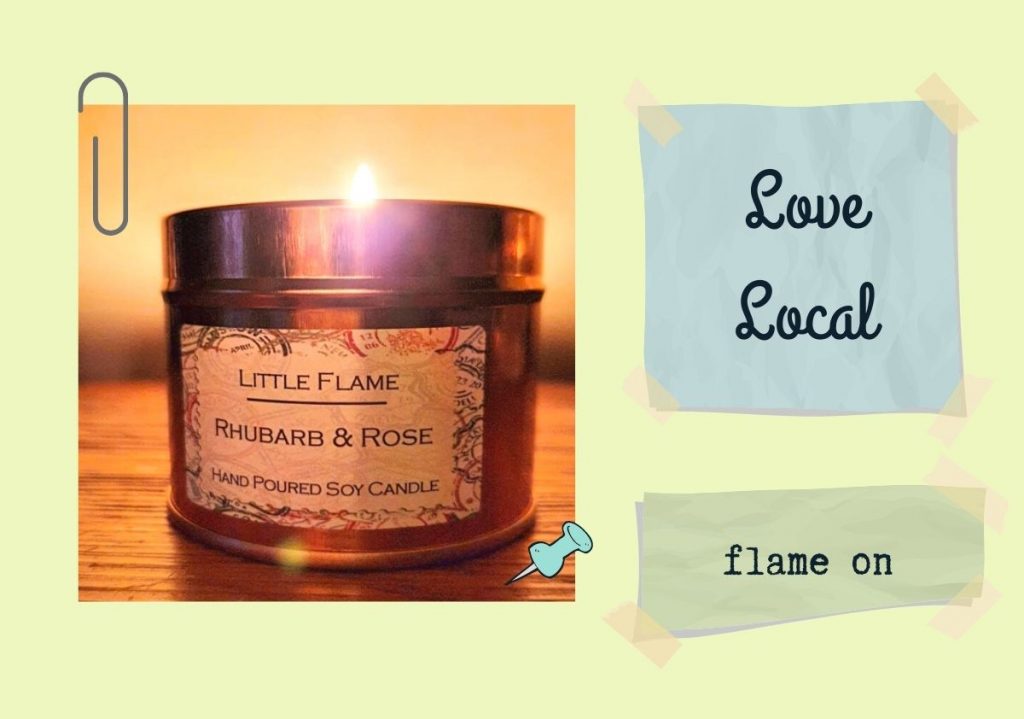
Have you heard of Little Flame candles? Based in Northamptonshire, this small business started to make these hand-poured candles upon retiring. After many months of research and testing, Little Flame was born. Did you know? Soy wax is non-toxic, clean burning and completely free of animal derived substances! Find them on Insta & Facebook and show a new small business some love.
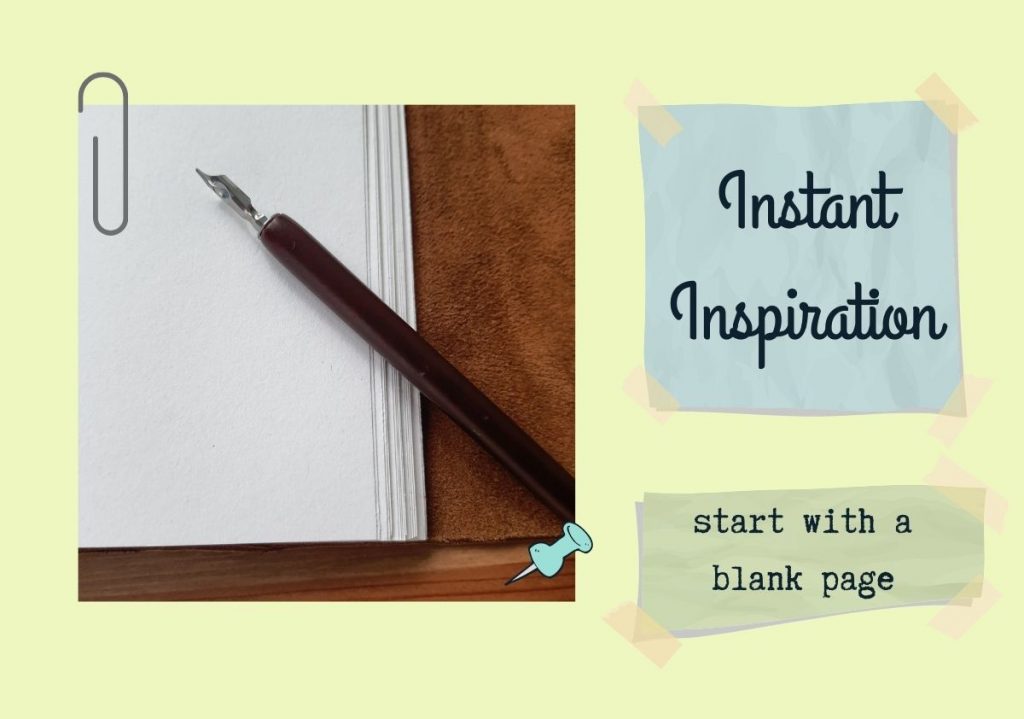
I don’t know about you, but I love a journal with blank pages. It gives you the freedom to do whatever you want; doodle, write, sketch, list, paint… and if you’d like more structure, you can simply add it in yourself. From creating lines, grids, tables and headers, Pinterest (where else?!) has some great ideas to get you going. Prefer video? Here ya go! In the market for a new journal? Check out this selection over in my Etsy shop.
I’m a huge fan of some beautiful creative lettering. But what’s classed as a font and what’s a typeface – and what’s the difference? Essentially, the Typeface is the base set of characters (e.g. Arial), the font is a particular set within the typeface (e.g. Arial Regular or Arial Rounded). Want more? Nerd yourself out here. Fancy some creative typeface fun? This book is great!
Ah, stationery, how do I love thee? Let me count the ways. You’re fun/cute/sensible/useful/organised/practical to name a few. There’s just something super satisfying about having a brand new set of pencils. How many of the below statements sound familiar to you?
You have a set of pencils that you’ve never used because that would spoil them. Same goes for all those adorably cute erasers you’ve amassed over the years.
SHARPEN them? You MONSTER.
You categorise your pens like Monica from Friends categorises her hand towels. Personal, everyday, fancy, guest…
No, you may NOT use my diary pen to do the crossword.
Notebooks: don’t EVEN get you started. You must have them all. Because you need one for lists, one for doodles, one for neat, one for writing up the neat one when you inevitably make a mistake…
A desk tidy with enough compartments and drawers to hold everything is just THE most delightful thing in the world. (But of course it still doesn’t hold everything and you have pots of pens, pencils, rulers, scissors etc. everywhere.) Same goes: pencil cases.
I still dream of owning one of these.
Even though you do use the diary and calendar on your phone, an event is not happening unless you’ve physically written it in your real diary.
You can shop a range of handmade stationery on Etsy, or learn more about what I do on my website.
Bring on the trumpets, my Folksy shop is open once again! You can find my range of hand bound leather journals and mini book necklaces there, plus… something completely new for me. Origami jewellery is something I’ve been thinking about doing for a long time, but couldn’t really think how to get the results I wanted. Paper is so delicate and needs reinforcing or coating if you want to make it durable enough to wear repeatedly. After going through a few different options, I finally hit upon the answer – setting the origami in resin is the perfect way to preserve it!
I’m so pleased with the results. To start with, I’m doing 3 animals, just to see how they do. I’ve chosen a crane, a butterfly and a fox. Which is your favourite? Are there any other animals you’d like to see?
You can find these in the jewellery section of my Folky shop and they’re also on Etsy, too.
Next up something not quite new, just a little improved: ‘Once Upon A Time’ book necklaces.
These are made, as always, from upcycled leather – the section used for the cover was rescued from a shoe factory. For the insides, I’ve used ivory paper; I think it just goes with the whole feel of the mini books. I’ve also added an extra stamp at the bottom, a kind of swirly flower – and of course there’s a little key charm.
Well that’s about it for news. Let me know what you think: anything new you’d like to see? A particular origami piece or a certain style of journal? Let me know! As always you can get in touch at ahoythere@thecraftfantastic.co.uk or via the contact page.
Spring/summer may be billed as the main wedding season, but what about all those autumn and winter brides? They’ll be busy planning away right about now, so I thought I’d share some ideas. Colour schemes, accessories, finishing touches, here are just a few images to inspire along with some stunning handmade products.
When it comes to colour schemes, autumn is my favourite! All those different shades of oranges and yellows are beautiful. Opt to incorporate subtle hints of seasonal colour, or go for something a bit bolder like in this bouquet and matching buttonholes. The bright oranges have been mixed with sheet music paper to create stunning effect:
And for the finishing touch to your tables, these copper hearts are perfect and can be used as wedding favours as well as decorative napkin rings:
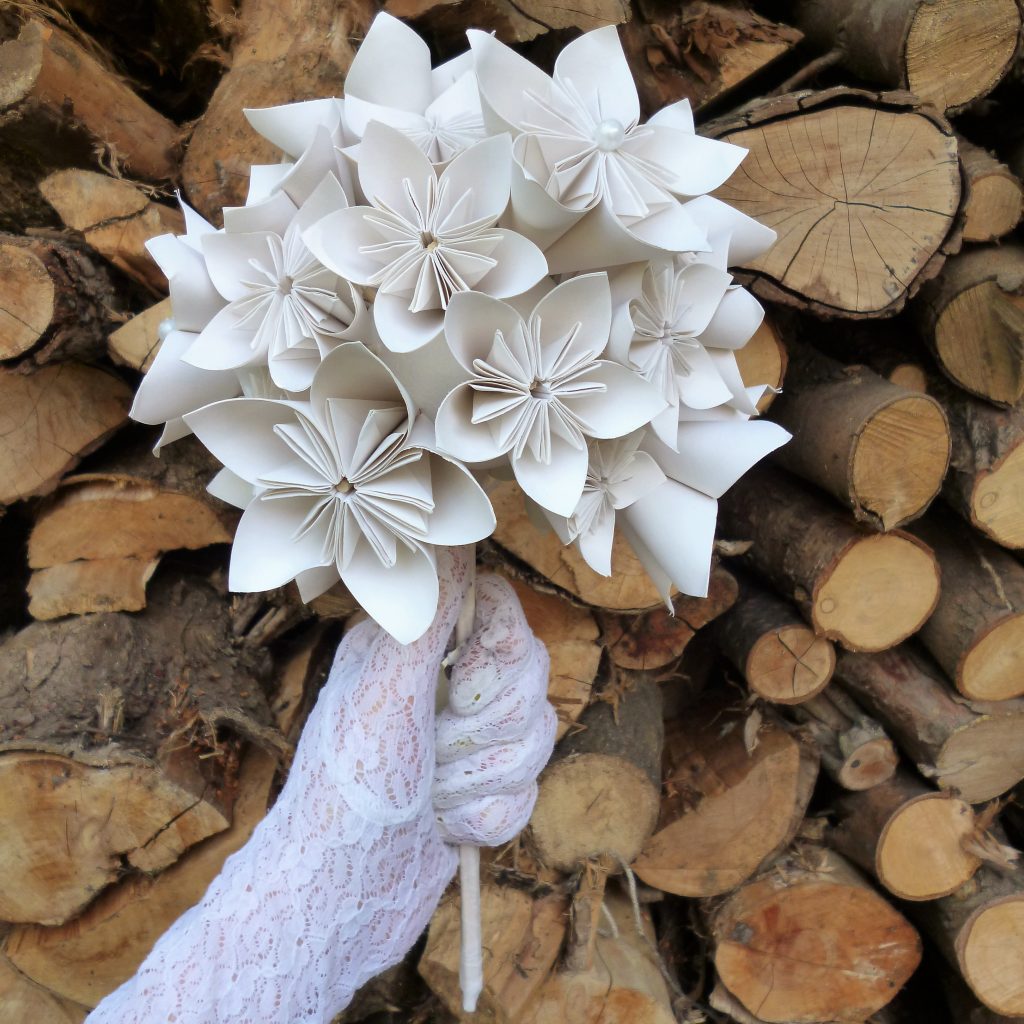
It may be cold in winter but it can be so beautiful. Take some inspiration from frosty whites and cool blues. This large bouquet is made from white paper, with pearly beads dotted around – perfect for a cold winter’s day:
And if you wanted to inject some colour, this pompomblossom silk ribbon bundle would look gorgeous:
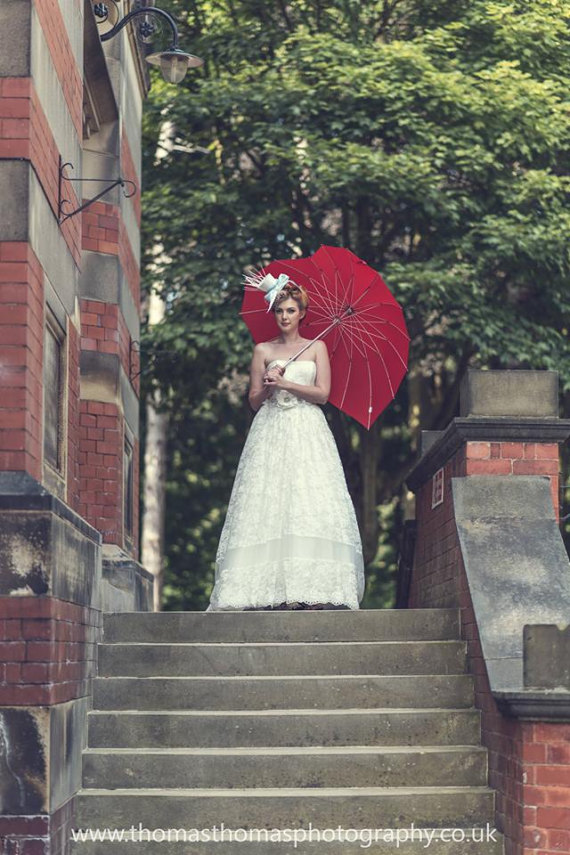
What about the weather? What about the weather! While it can rain at any time of the year, it is more likely to be wet in the winter months. So you just need to be prepared; and as it’s your wedding you need to do it in style – these heart shaped umbrellas from Simcha Central’s Etsy shop are so delightful, you’ll want to use them all the time:
As for bridal head wear, this beaded crown from VBMillinery is perfect for winter ice queens:
There are so many beautiful colours perfect for autumn/winter weddings, below are just a few more examples of my favourites. Please don’t hesitate to contact me if you’d like more info on origami flowers for your big day – spaces still available for autumn/winter 2017.
Wedding season 2017 is in full swing! The Craft Fantastic HQ is full of origami bouquets and paper flowers. I’ve been hard at work over the last couple of months finishing orders – and I’m still going! This is my first full year doing weddings and I’m loving it; my brides are really creative and it’s so much fun putting together their perfect flowers for the big day. Here are some sneak peeks!
I’m pretty much fully booked for summer 2017 – just taking small commissions – but there are spaces for autumn/winter and of course 2018! You can find The Craft Fantastic at the upcoming wedding fair at the Double Tree Hotel, Stadium MK.
If you’re not sure whether paper flowers are for you, this will give you a chance to take a look at the bouquets in real life. You’ll be able to try out the different sizes, view the matching buttonhole options and see what you think of the new range of headdresses. There’ll be pomanders and wands for flower girls, small posies and large bunches, table decorations and garlands.
As always, I’ll have a range of hand bound guest books to choose from, all of which can be personalised. There’ll be a good selection that can be purchased on the day.
Hopefully I’ll see you at the Milton Keynes Wedding Show, Sunday 2nd July!