Do you find your creative clutter soon gets out of hand? Being a maker myself, I have lots of different tools and materials and I need them all within reach; which quickly leads to having stuff everywhere. I have found a few things that help, though, so I thought I’d share them with you.
Recycling or rubbish? I’ve got a bin for both. I end up with lots of scraps of paper and keep them all together to recycle, or for turning into handmade paper (a constant future project).
Upcycle and repurpose. Got an old chipped mug? Use it to keep your pens and pencils in. If you’re like me and have LOTS, you can keep a particular collection in each mug; felt pens in one, fine liners in another etc. You know those little glass pots you get delicious desserts in? They are GREAT for keeping small bits and pieces in.
Make the most of desk tidies. A purpose-built desk tidy has plenty of room for larger items and can happily accommodate your bulkier stationery. These wooden houses are the perfect home for big brushes, scissors and chunky pens.
Store your bits & bobs. A shallow tray or dish is the perfect place for anything that you need to hand, but that’s too small for a tall holder. Use them so you’ve got easy access to things like pencil sharpers and rubbers, or any small bits of string/wool/beads that may usually accumulate on your desk.
Stash your stationery. If there are things you need tidied away, the classic pencil case is the way to go. They’ll keep all your creative tools tucked away until you need them.
Hope these hints and tips have helped to get you a bit more organised! What are your top tips for staying on top of creative clutter?
Find my full range of handmade stationery in my Etsy shop.
At the end of last year, I was commissioned to create a book of epic proportions. Code name: the Beast.
The request came from a brewery, as they wanted something to house their recipes in. They use a lots of old, re-purposed parts for their equipment and the fact I work with upcycled leather fit perfectly.
The client gave me a brief outline of what they wanted, and we went back and forth getting the details right; I really wanted to make sure I understood just what look/feel they were after. Here are the specs I was given:
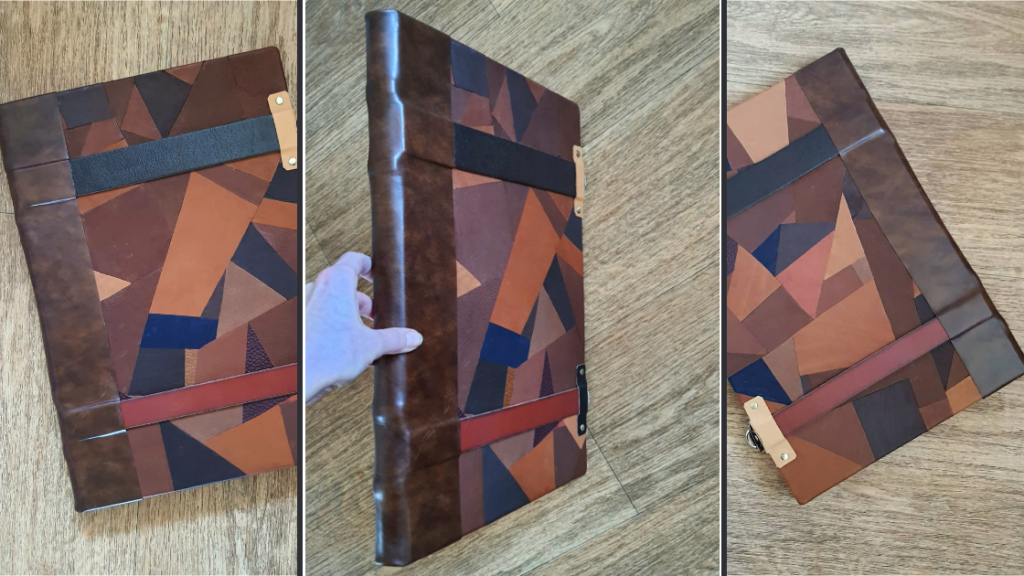
A3 size book
Arcane meets modern look
Leather ‘patchwork’/made-from-spare-parts cover
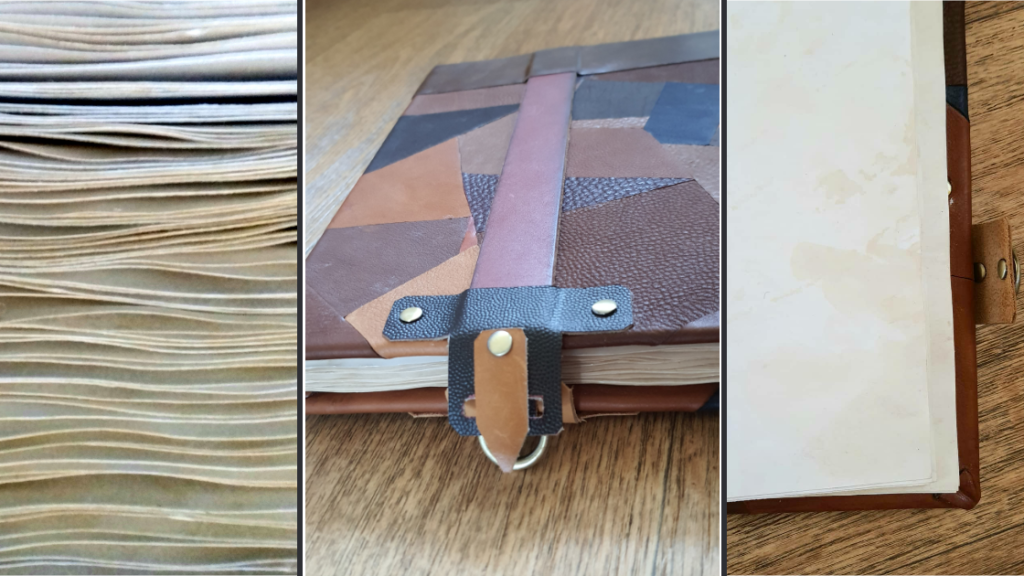
Unlined pages with weathered/tarnished look
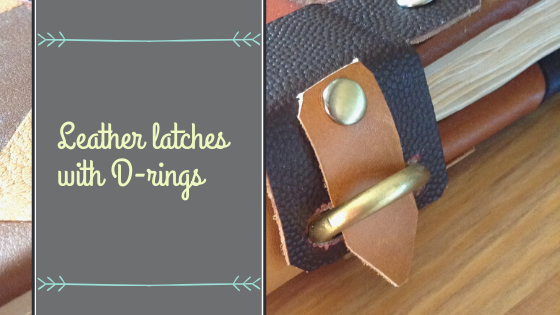
Some kind of fastenings, latches or old leather belts, on upper & lower sections of the cover, with the ability to lock
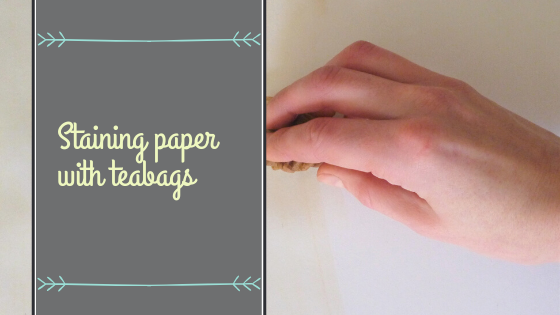
To get the A3 size, I had to order A2 paper to fold down. Luckily, my favourite cupcycled paper comes in that size- made from upcycled takeaway cups, it really ties in with the whole repurposed/reused feel. Further completing this theme, and giving the paper that weathered/tarnished look the client was after, I stained all the pages (and my hands!) with tea. The paper then dried with a lovely ripple to it, adding to the aged feel.
Once folded, the signatures (sets of folded pages) were sewn together using waxed thread, onto linen tapes- these attach to the covers and help make such a big book sturdier.
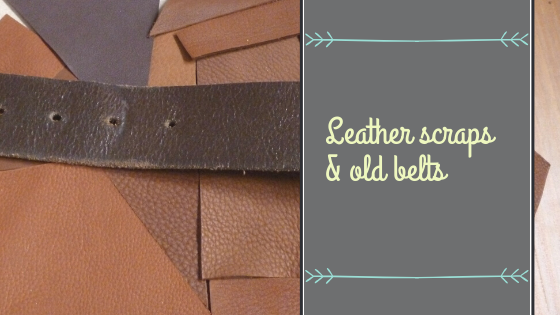
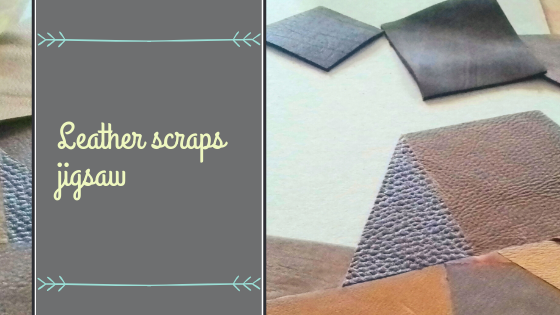
Heavy duty card was used for the covers, thick enough to take the leather I was using; bookbinding typically uses very thin leather, but as I was using scraps from my rescued leather stash, it was around 3mm thick (believe me, for bookbinding that’s thick!). I’ve boxes of scraps and offcuts and it was lovely to be able to use them. Thankfully I love jigsaws.
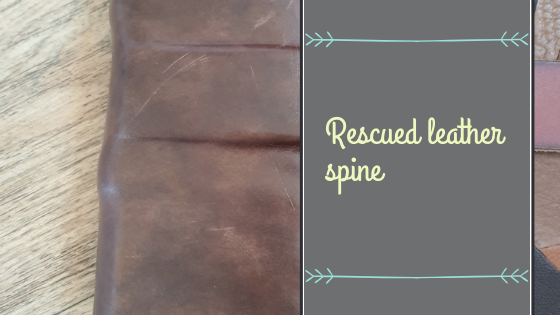
The spine was made from a single piece of leather; rescued, like the rest, from a shoe factory, it was slightly worn with a few scuffs. So, perfect for the project. I have a say this took a while to wrestle into place, as it needed to be even at the top, bottom and both front and back, along with the fact that it’s a huge book. But I got it there eventually, fixing the front and back covers into place and creating a nice soft spine that opens and closes easily.
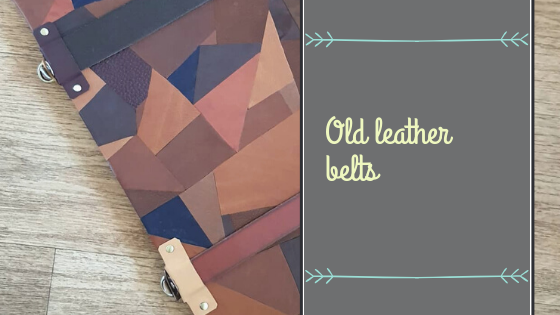
The original idea was to have old leather belts attached, so the book would fasten closed using the buckles. However, as I worked on the idea, I discovered it just wasn’t going to work; the book was so big, the belts and buckles quite cumbersome, and attaching them fully meant they were tricky to unfasten. After going through and disregarding several options with the customer, I found a diagram to make latches from leather, rivets and D rings and we settled on that. They took me a while to get just right, but I absolutely love them and will be using them again!
The old leather belts didn’t go to waste though. I attached the lengths of leather so it gives the appearance that they’re part of the latches. They also help break up the patchwork of the cover.
So, finally I was finished and the Beast was ready to be sent to it’s new master! I was sad to see it go and nervous to see how it would be received. I’d been sending updates throughout, but it’s very different to holding the finished work in your hands and looking over it in real life. I’ve put their response below!
“… I LOVE IT! This is so awesome, you’ve really nailed it!
I’m incredibly happy with how it turned out and am ultra-excited to start filling it up and make part of our lore.”
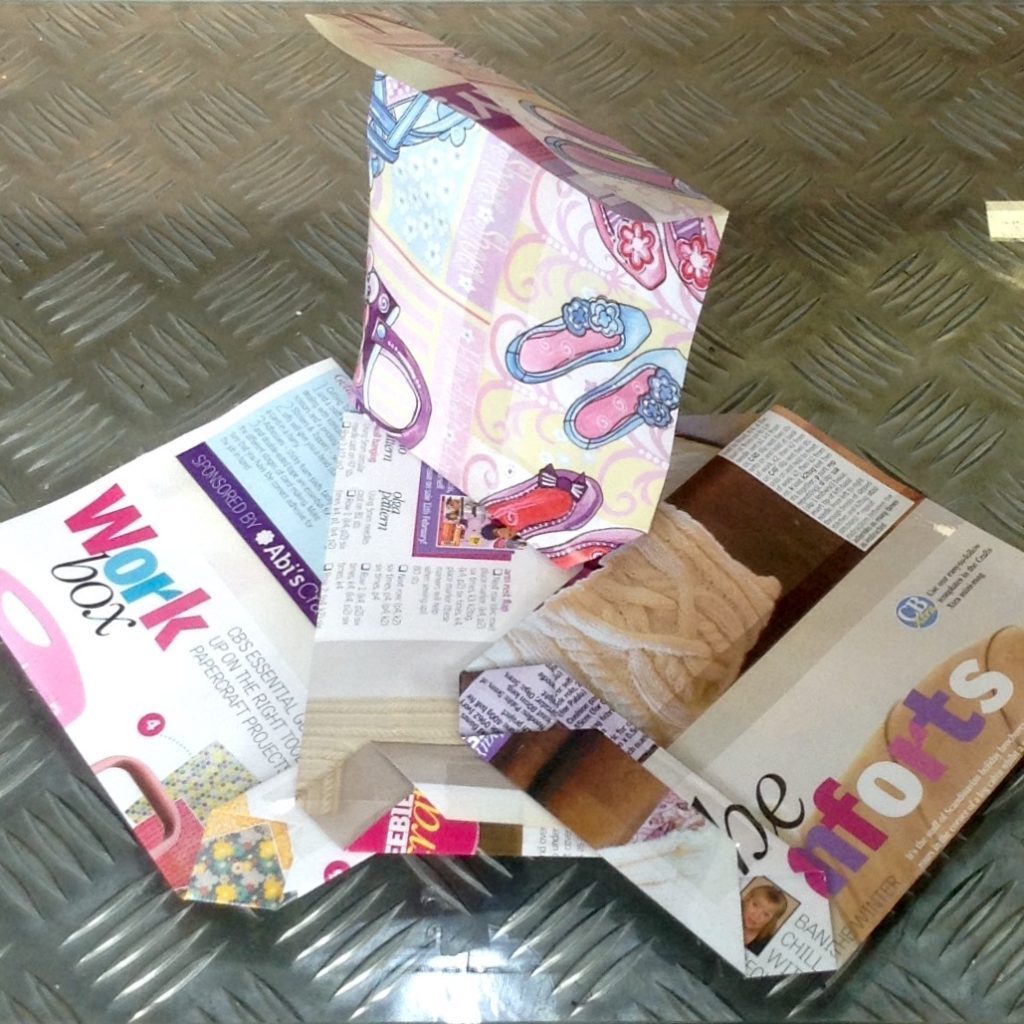
I’ve made gift bags similar to this from old sheet music, but they are great made from old magazines.
You can easily make this simple upcycled version yourself, all you need is an old magazine page and some tape. If you’re after something fancier, you can use any nice sheet of paper you like (A4 works well) and instead of taping, overlap the edges slightly and glue them down for a neat finish.
Lay your page out landscape
Fold one side in to the middle (you needn’t be exact) and run your thumb over the fold to crease well.
Fold in the other edge so that it meets the first one.
Tape it up, right the way from top to bottom (or overlap slightly and glue).
Fold up the bottom – roughly a quarter, but again, it needn’t be exact.
Open up the bottom section you’ve just folded over…
…then squash each corner down in turn, so they make triangles.
Fold the edges of the bottom section to meet each other in the middle.
Tape it up! Again, you can overlap slightly and glue at this point- just make sure you’ve glued the edges well, as this forms the bottom of the bag.
Ta da! Done! Stick your hand in (carefully) to open it out; the bottom should make a nice flat base.
Once you get going, they’re really quick to make. They make great bags for small gifts instead of using wrapping paper; they look so colourful!
When it comes to making notebooks and journals, I’m a huge fan of using upcycled materials for a number of reasons, which I’ll share below.
Take this map-cover book, for example. The cover paper is taken from an old map of Brussels. The map made a couple of A5 notebooks and there’s some left over to make smaller books; and every book is different. Sure, I could get specific maps of places of interest/print maps off and get consistent covers, making bigger batches of each book. But I don’t want that. I love that every single one of my map books is different- one of the reasons I love handmade is that you’re getting something unique!
Even if I’ve got more of a certain material, I still like to work in small batches, making a couple of each different book. I get inspired by the materials on hand, and having just a little of a lot of different materials really gets my creative brain going. The spine of the above book is has been upcycled from an old leather jacket; using it for just the spine allows the material to go further and enables me to use all those thinner, smaller sections of materials. Sure, I could buy new leather in bulk and make bigger batches of notebooks that were all the same; but the way I work means you really are getting something pretty unique!
Also, I like to use as many of the little scraps as I can. The above pocket book was made from an off-cut of soft grey leather; it had small slits all down the sides, but because I made small A7 books from it, it works fine for me! See the thin leather strap? That’s an off-cut from the same leather jacket used for the spine of the key print book. If I’ve got scraps left, I try and think how I can use them. Mostly they make my mini books:
I’ve put together a short video on this subject and you can find it over on The Craft Fantastic YouTube channel, or watch below. I’m still getting used to doing videos and this is less than perfect; but perfection’s overrated, right? Listen out for me getting my words the wrong way round towards the end 😀
To see my selection of hand bound notebooks, bullet journals, travel journals and more head over to my etsy store.
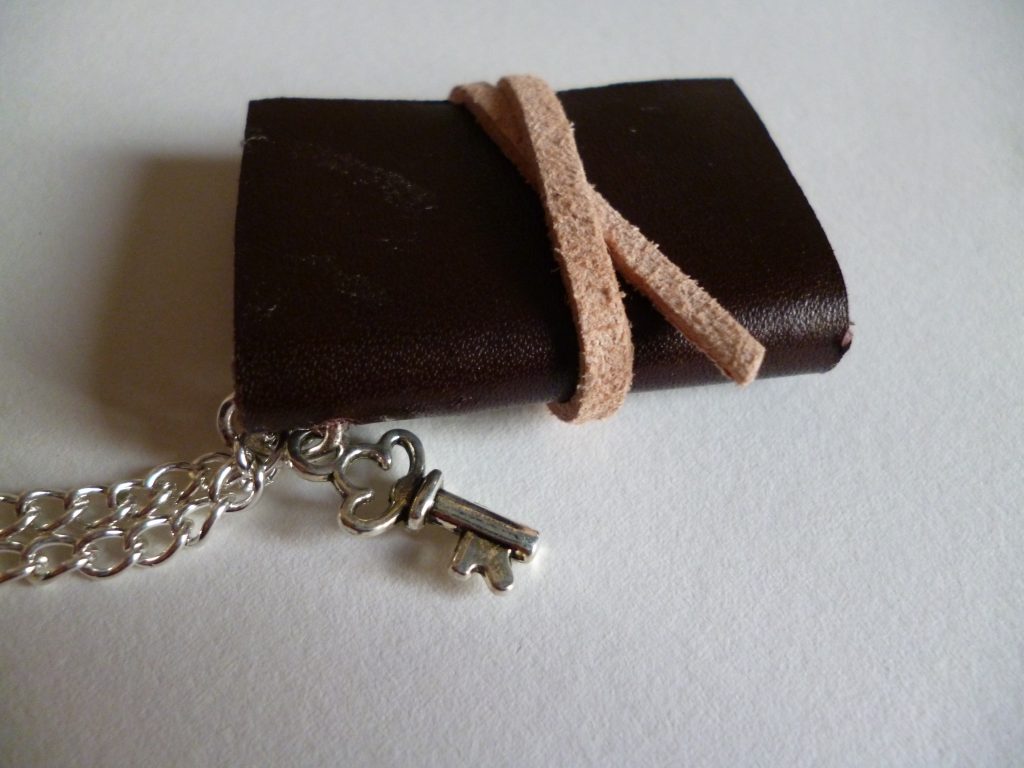
Made some new mini notebooks this weekend. The insides are sketchbook paper, while the covers are upcycled from a pair of old boots. They’re tied with a thin ribbon and have a metal loop attached so they can be fastened to a necklace or key ring etc.