This origami heart is simple to fold, so it’s a good model for beginners. Use them to decorate handmade cards or gift tags.
As with all origami tutorials, my two main rules are fold neatly and crease firmly.
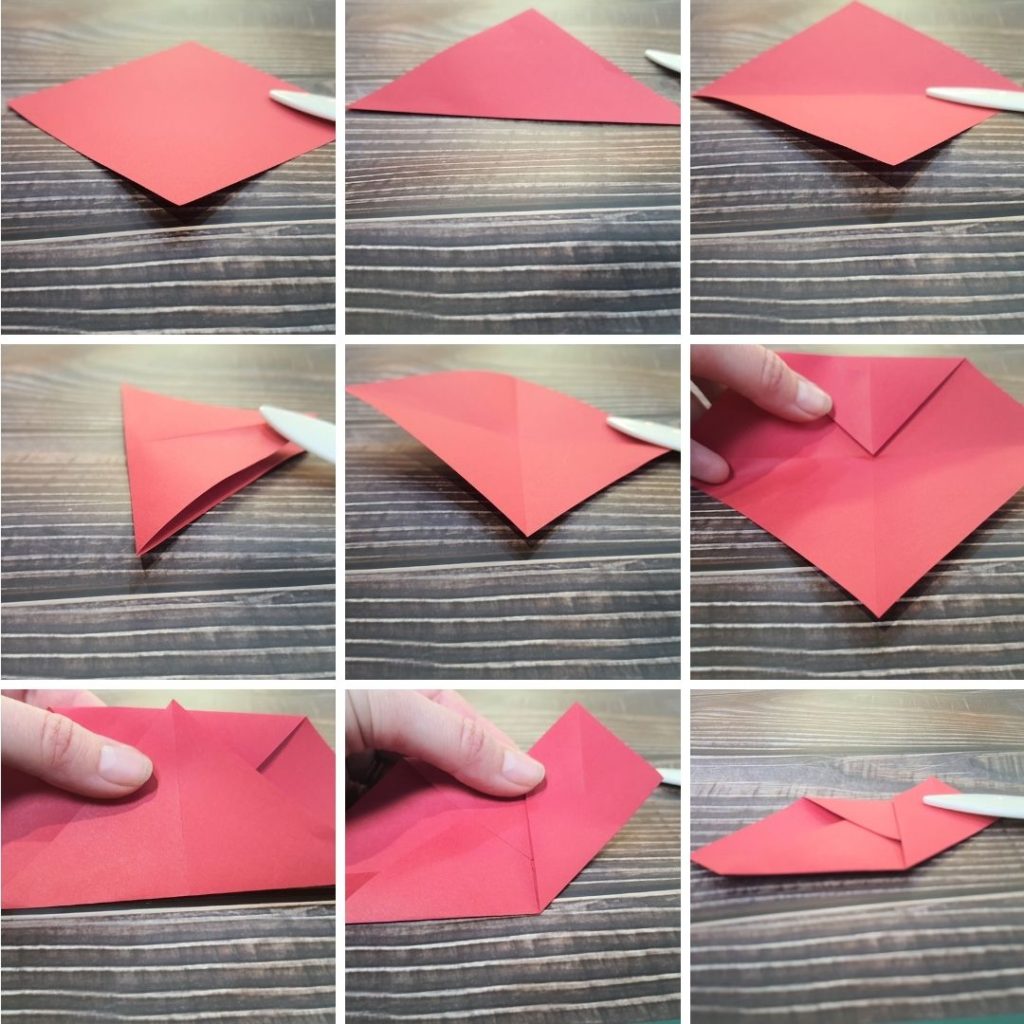
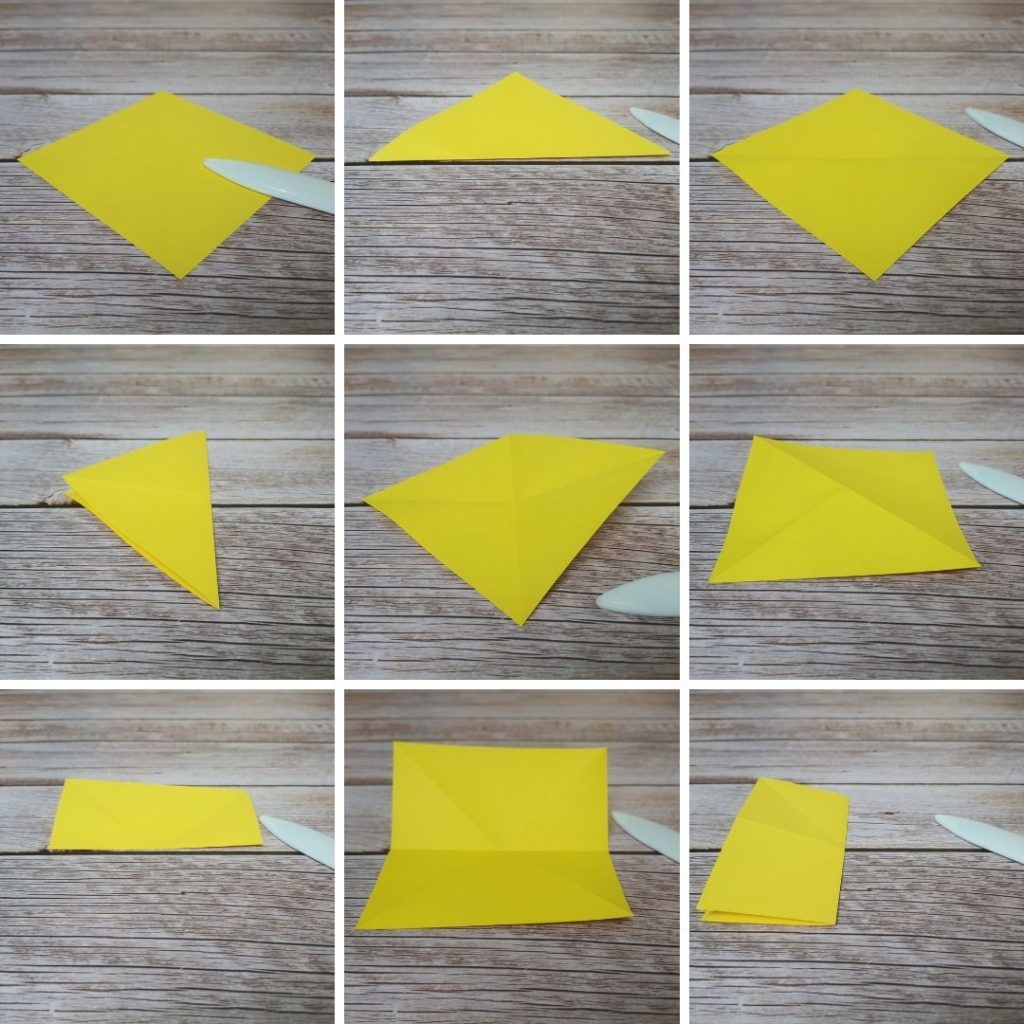
- Lay your square of paper so it’s like a diamond.
- Fold in half, point to point, crease and unfold.
- Do the same again, folding in half the other way.
- You’ll be left with vertical and horizontal lines running from corner to opposite corner.
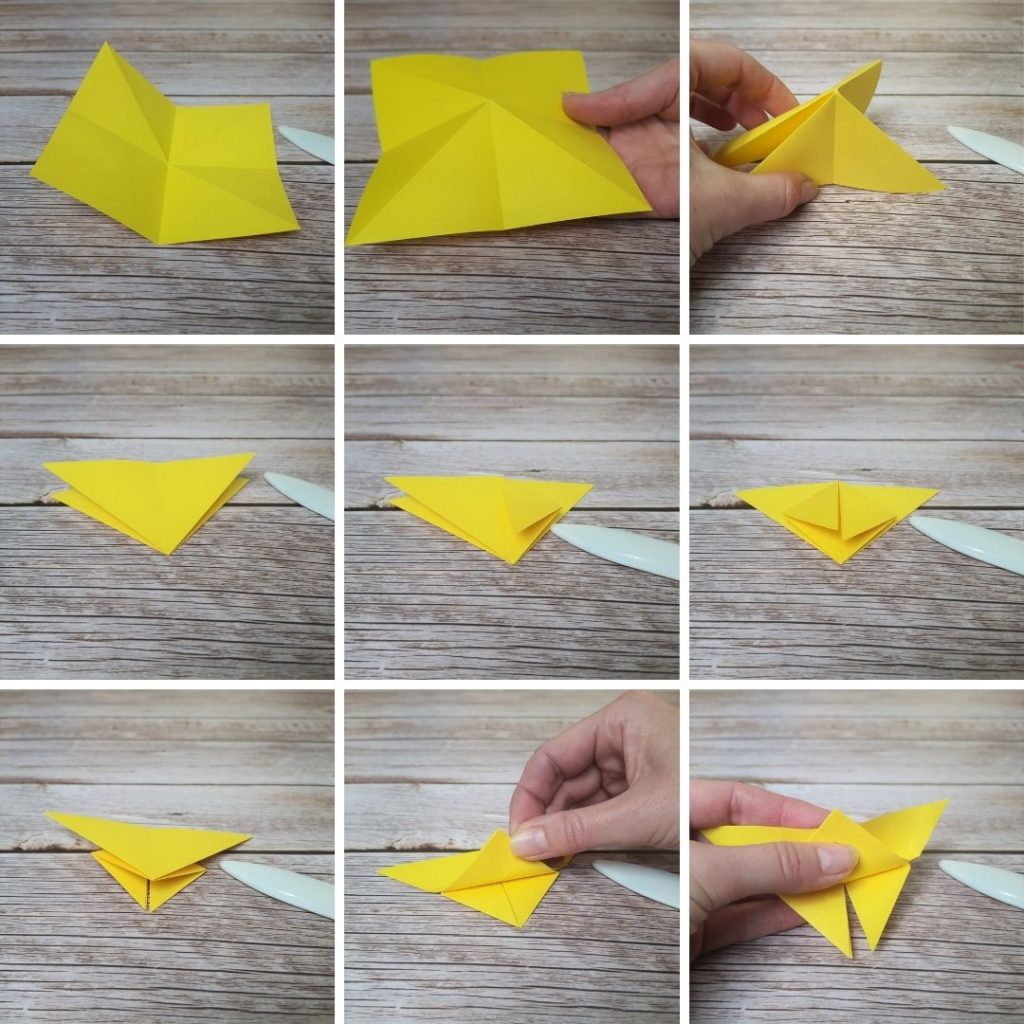
- Fold the top corner down to meet the central crease where the lines cross.
- Take the bottom corner and fold up so it meets the flat top edge (made in the last step).
- One side at a time, fold the outer corners up, so the bottom edge meets the central crease (the corner point will now be at the top).
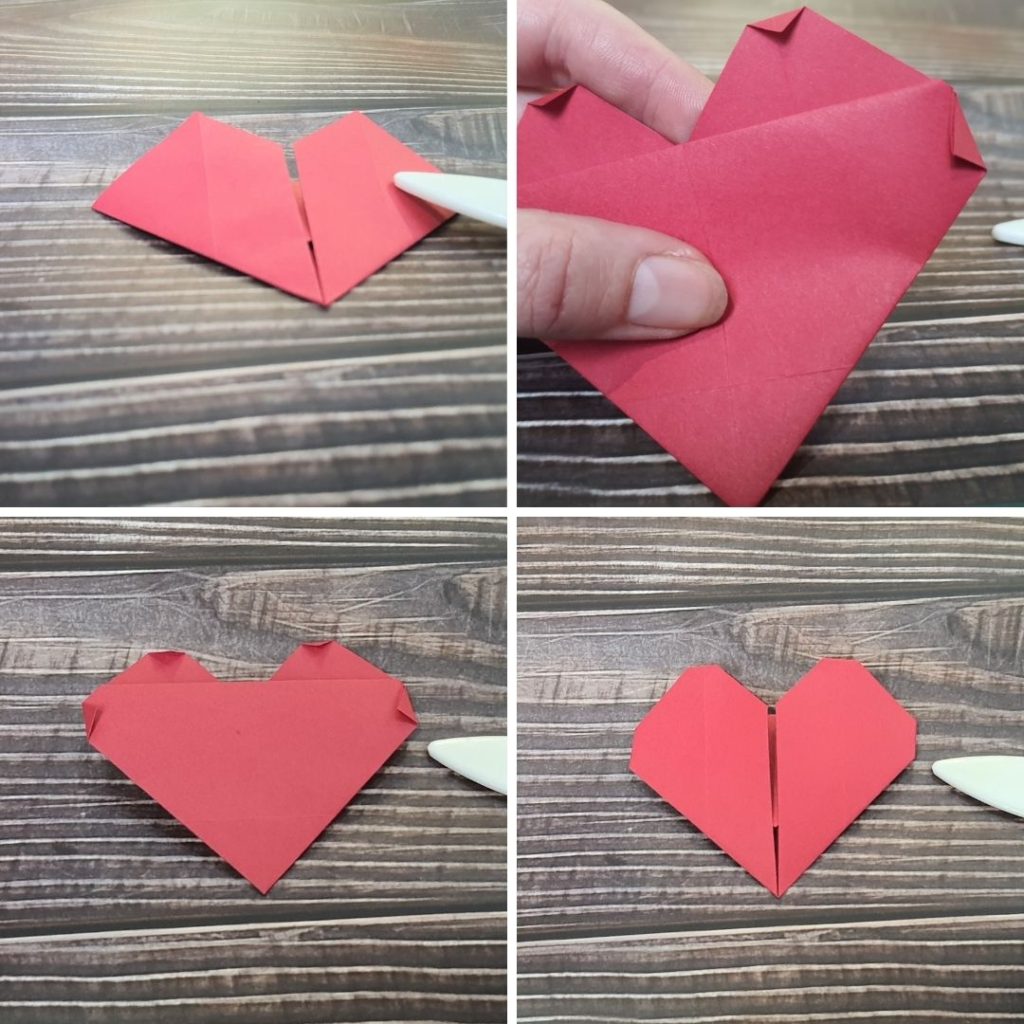
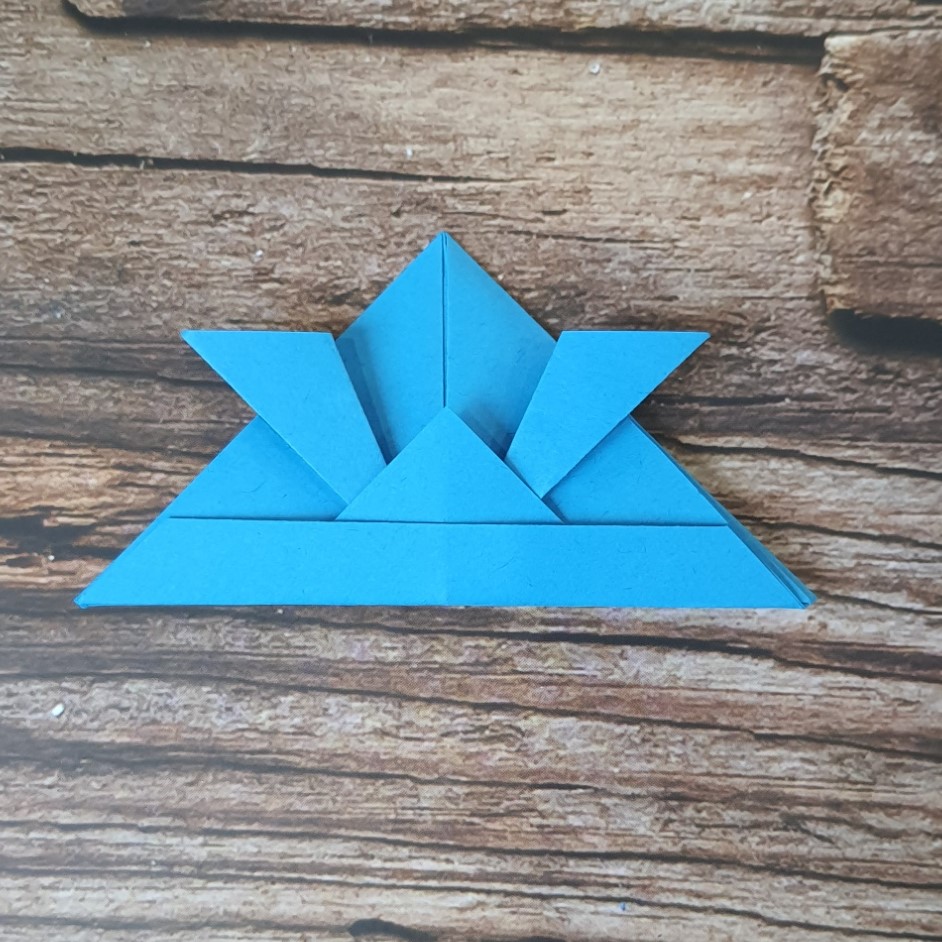
- You should now have a rough heart shape.
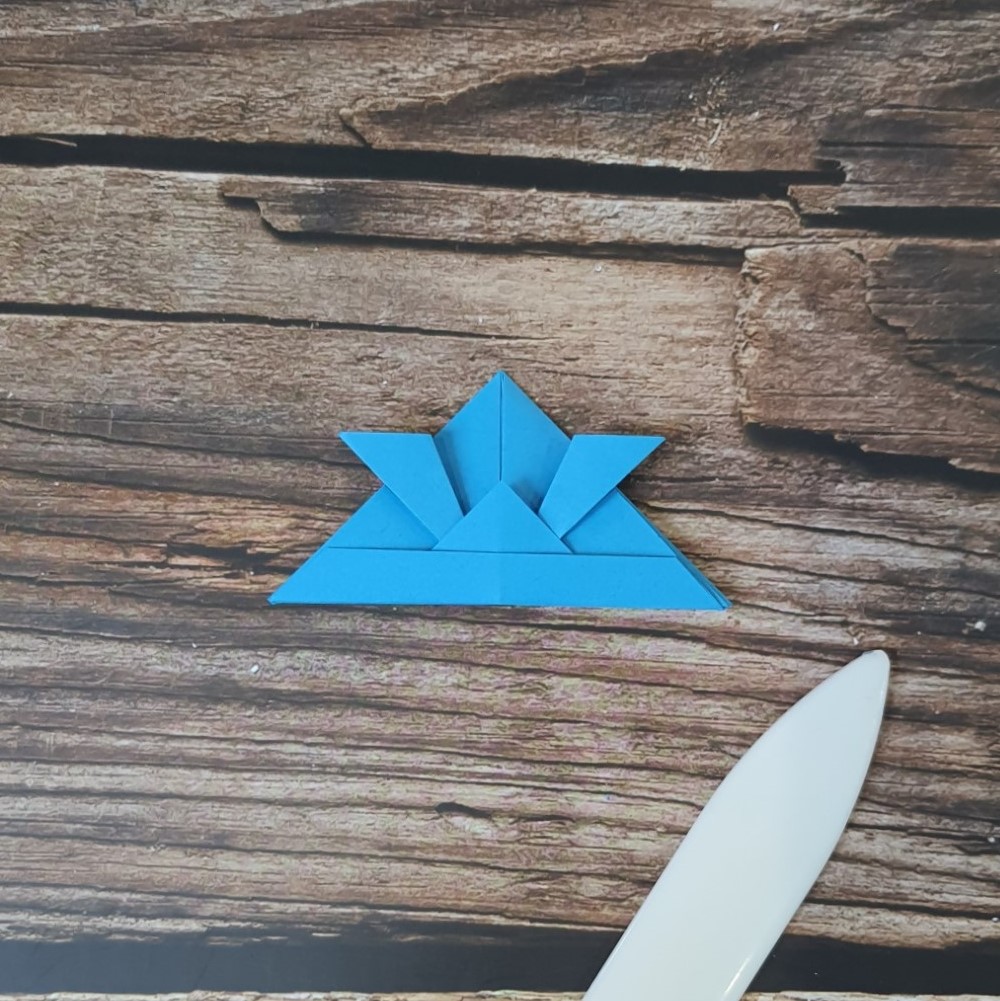
- Turn the model over and fold in the 4 top points very slightly, to create a more rounded heart shape.
- Crease these well so they stay in place and turn the model back over.
- You’re done!