Have a go at making this origami star! It may seem fiddly, so have a practice run first on a scrap square of paper to get the hang of it.
It’s a four-pointed star, so a lot of the folds you’ll be repeating the same thing 4 times on all 4 sections/layers (often 2 front, 2 back) – bear this in mind when following along.
You’ll need a square of fairly thin paper (if your paper is double-sided, start with the plain side facing up). Don’t forget to fold neatly and crease firmly!

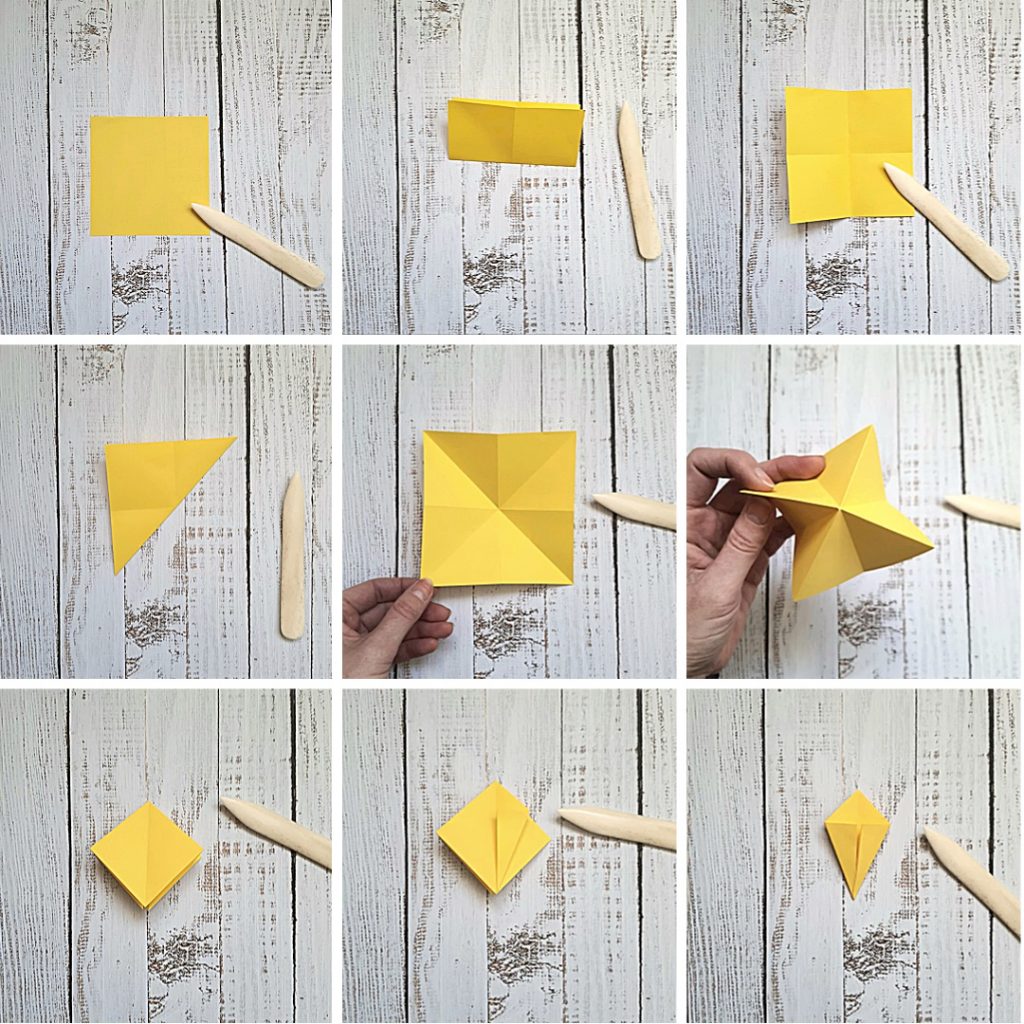
- Start with the paper square on in front of you.
- Fold in half from top to bottom, crease and unfold, then fold in half from side to side, creasing well.
- Open back out into a square
- Turn the paper over, then fold from corner to opposite corner; again, do this both ways.
- Open back out into a square.
- Pick the paper up and press the centre upwards, bringing the edges down.
- You should end up with a folded diamond shape, with open layers at the bottom.
- Taking the top layer only, fold the outside bottom edge to the centre crease.
- Repeat this step on all bottom edges, front and back.

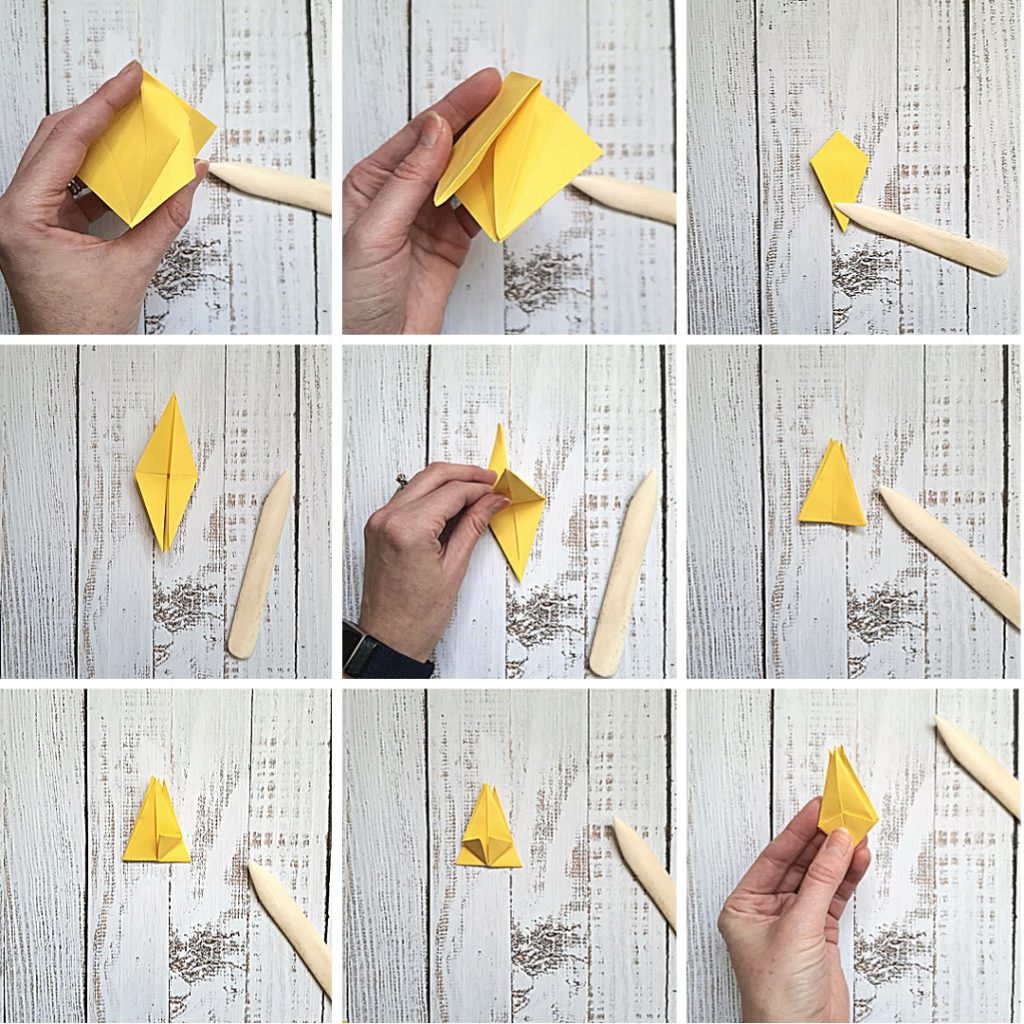
- Next, you’ll need to open up the folds you’ve just made and, using the creases from these folds, push them inside…
- They should look like this!
- Repeat with all 4 folds. You should have a lot of layers at the bottom now!
- Using the top layer only (the long triangle at the bottom), fold the bottom point upwards.
- Repeat for all 4 points in turn.
- At this point, the model should end look like a triangle pointing upwards.
- Take one of the bottom outside corners and fold it in to meet the centre crease.
- Again, this step will need to be repeated with all 4 bottom corners in turn, so fold the front 2 up…
- …then turn over and fold the back 2 up in the same way.

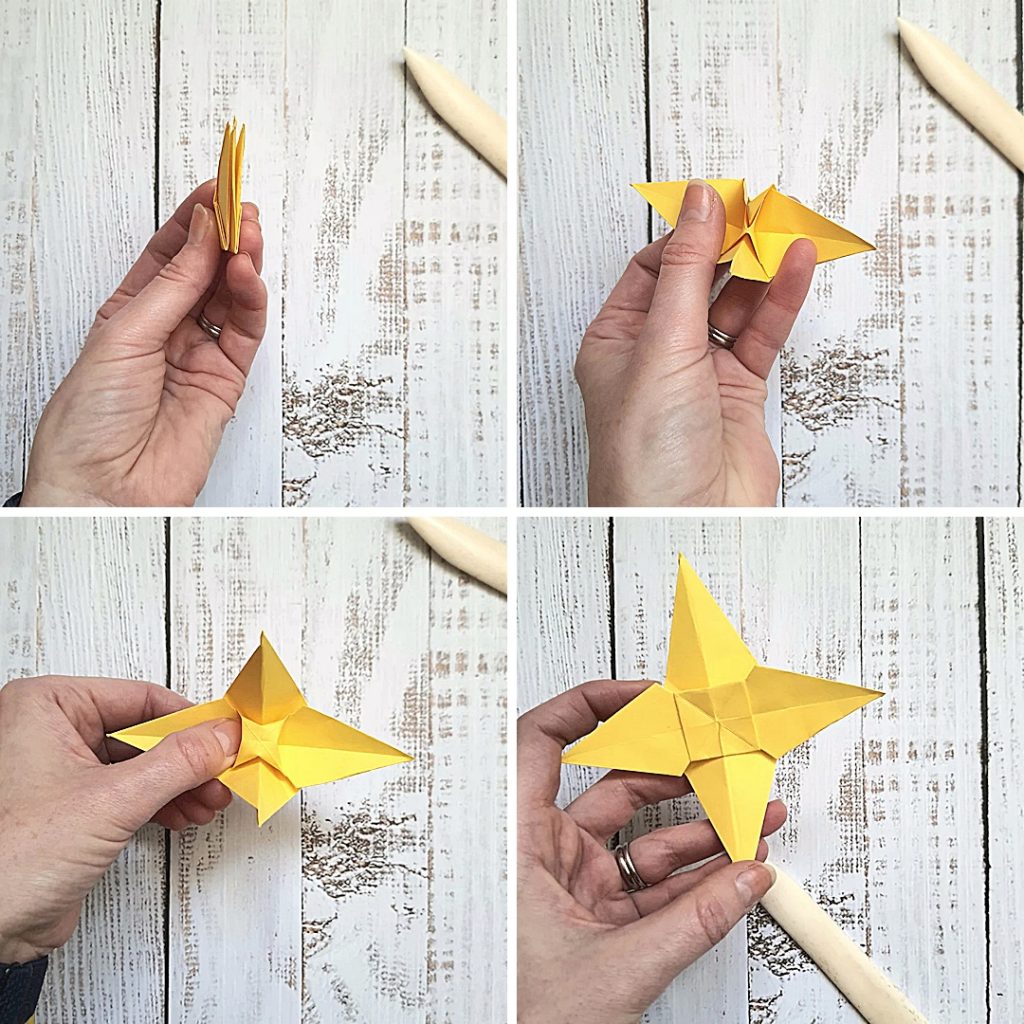
- Pick the model up for the next step.
- We’re going to open up the star, taking all 4 of the top points out and down.
- It helps if you stick a thumb either side of the central point, to help you ease it open – the middle of the model should kind of lift and flatten into a square.
- Press all the creases flat and you’re done!
- Ta da!

