Categories
Tutorial

Weekend baking- Honey & Walnut Cake

This cake is not as faffy as it seems and it is de-licious.

Ingredients:

  • 175g butter
  • 100g castor sugar
  • 100g clear honey
  • 100g walnuts
  • 3 large eggs
  • 225g self raising flour

The recipe calls for a 20cm square shallow tin, but I used a round one!

Firstly, preheat your oven to 180ºC. While it’s heating up, line your tin with baking paper and measure out your ingredients.

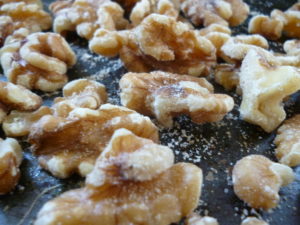
Next, toast walnuts in the oven for 5-6 mins; cool a bit, then roughly chop and set to one side.

Meanwhile, melt the butter in a pan over a low-ish heat. And the sugar and honey and stir until dissolved. Once it’s nice and smooth, bring it to the boil, then pour into a large mixing bowl and allow to cool to about room temperature.

Meanwhile, beat the eggs lightly. Add to the cooled honey mixture and whisk until evenly blended.

Finally, gently mix in the flour and chopped walnuts. You should now have something that resembles a cake mix! Pour it into the tin, level out, then bake in the oven for 30-40 mins. I was using a fan oven and it was pretty much done after about 25 mins; just keep an eye on it, once it’s a lovely deep golden brown and springy on top, it’s ready!

Allow to cool on a wire rack, then slice it up and eat it- makes a great accompaniment to coffee or Bailey’s. Or indeed coffee and Bailey’s.

Categories
General

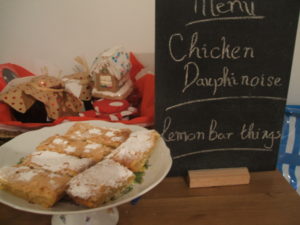
Weekend Baking- the best lemon bar things ever

EVER. Seriously. The husband and I had people round for dinner and I made a batch of 12 lemon bars; we each sampled one before the guests arrived, of course, but the other 10 we ate between the four of us quite quickly! They were just too nice, if I do say so myself; I had my proud face on all evening.

Here’s the recipe- lots of steps but simple enough and so worth it.

Pastry base:

  • 140g/5oz plain flour
  • 60g/2oz granulated sugar
  • 1/2 tsp salt
  • 115g/4oz cold unsalted butter

Filling:

  • 1 lemon, unwaxed and scrubbed
  • 2 large eggs, room temperature
  • 200g/7oz granulated sugar
  • 2 tbsp plain flour
  • 1/2 tsp baking powder

Before you begin, grease and line a roughly 8-inch square baking pan (mine was rectangular and about 7″ x 10″!) and stick the oven on to preheat at 180 C.

First up, the pastry base. Start by stiring together the flour, sugar and salt with a whisk until evenly blended. Cut the butter into cubes and combine with the dry ingredients. I did this by hand; one of the benefits of having constantly cold hands is that I have the power to make great pastry 🙂 The consistency you’re after is mostly coarse crumbs, but still a bit chunky. Basically, I would make sure there are no huge lumps of butter and then not worry about it too much. Press this mixture evenly into your prepared baking pan.

This goes in the oven for 15-20 mins until lightly golden, giving you the perfect amount of time to prepare your filling.

Zest and juice the lemon. You’ll need 1 tsp of the zest (or more, if you like it zesty) and 2 tbsp of juice. Put these in a big bowl and add the eggs and sugar. Beat these together until well mixed (I recommend an electric whisk, if you have one) then speed things up for about 1-2 mins, until themixture is pale and foamy. Combine the flour and baking powder and then whisk into the lemon mixture.

By now your base should be ready. Pour the topping evenly over the crust and pop it back in the oven for 25-30 mins, until lightly golden on top.

Once you’ve taken it out of the oven, DO NOT get over excited and try to take it out of the pan to cool. Leave it in there. After it’s nice and cool you can turn it out, cut it up and enjoy!

 The recipe suggests dusting with icing sugar, however, while it looked pretty and tasted nice, it tended to just fall off when you picked them up; which is a shame as I spent ages dusting little stars!

Categories
General

Weekend Baking- Cornflour ribbon cake

This is something I found in my grandma’s recipe notebook and thought it sounded interesting. The notebook is a little scrappy one, with no cover (shock horror! If Grandma Wheeler were still alive, she would have recieved a fancy new notebook for Christmas) and the contents are often equally scrappy, meaning there’s often a small amount of guess work. Here’s the recipe as it stood, word for word:

Beat 4oz marg and 5oz caster sugar together. Add 2 eggs and beat until smooth.

Sift 4oz S.R. flour and 4 oz cornflour tog. and add to ingredients with 1 tbsp milk.

Divide mixture into sections and to each add a diff. food colour, or cocoa to one mix. 

Grease a 7″ baking tin and drop a little of each coloured mixture into the tin, till all mixture used up.

Bake at mark 4 for 3/4 to 1 hour.

Now, this seems quite straightforward, but if you are going to attempt this, here are some handy tips…

DOs: Use butter instead of marg if you wish, it’ll be fine. Really make sure the flour is mixed in well; there’s a lot of it! Thus, when it says ‘drop a little of each mixture’ what it should really say is ‘thwack it off the spoon’. Seriously, with all that flour it’s never going to be dropping consistancy. I made a MESS doing this.

DON’Ts: Be careful what kind of tin you use. I used a round one, which was fine, but it meant that the mixture went in lumps side by side; I think it would be much easier to use a loaf style tin, and try to layer the mixture. If you do dollop, (which does provide a nice effect still) when you’ve dolloped the mixture into your tin, don’t just leave it; I was in a rush and made the mistake of leaving mine in dollops, and ended up with a… textured surface… I think perhaps trying to level it would have been a good idea.

However, once it was cut up it did look rather pleasing.

Due to the cornflour, the taste and texture was a bit different to regular sponge cake; however, not at all stodgy or heavy, which was my worry. It was in fact rather tasty.