Categories
Handmade leather journals Notebooks Paper Stationery Stationery

Choosing the right pencils & pens for your journaling journey

Should you use pen or pencil for journaling? What’s best to use in your notebook? Whether you want to use your blank pages for writing or drawing, it’s nice to know how your pens and pencils will work with the paper. Let’s take a look, shall we?

The paper used in my journals is 140gsm cartridge paper (it’s been made using upcycled takeaway cups!). This paper is quite sturdy and will take different mediums; pens and pencils, and also some paints (more on that another time). Here, I’ll be looking at some of the different pencils and pens you might be using for writing or drawing in your journal – you’ll be able to see what each of them look like on paper.

Ever wondered what the letters and numbers on pencils mean? Generally, HB is your bog-standard pencil: H = hard, B = blackness. You can get various grades of H & B pencils. With H pencils, the higher the number the harder the pencil, creating a harder, lighter line. When it comes to B, the higher the number the softer the pencil, creating a softer, darker line.
While you normally associate pens with writing, you can use them for drawing too. There are loads of different types of pens; I’ve chosen 3 I think fit best with using in journals.

So, what difference does this all make when it comes to drawing and writing? Here are some simple doodles to give you an idea:

Use H to create hard, clean lines. The fact that they produce lighter, more precise lines makes them good for writing and technical drawings.

B pencils can be used for sketching and adding texture. Because they’re soft, they can be more expressive; it also makes them easier to rub out!

Biros (or ballpoint pens) are best for writing – great for everyday journaling. But you can doodle with them too!

Fineliners are perfect for journaling; you can use them for writing, drawing or doing your layouts.

Dip pens are just that – pens that you dip… into a pot of ink! They’re often used for calligraphy, but you can use them for sketches, too. Using the different angles of the nib means you can create various line widths and strengths. They can take a while to get used to, but are very satisfying to use once you’ve got the hang of it.

What else would you want to know about the paper quality of a journal or notebook? How about how much it shows through to the other side? As you can see, with the paper I use in my handmade journals, you can hardly see the pencil, while the dip pen and fineliner show through the most.

Head to my Etsy shop for handmade blank

journals and notebooks.

Categories
Craft Origami Paper Tutorial

Simple origami pencil holder – step by step tutorial with pictures

Learn how to fold a simple pen or pencil holder from a piece of paper! This origami tutorial gives you pictures with step by step instructions.

You’ll need a square of paper – I’ve used standard origami paper, which is 15x15cm and fairly thin, but you can cut a square from an old magazine, newspaper, or sheet of printer paper. You’ll also need some glue or tape.

My two main rules of origami are fold neatly and crease firmly; if you don’t have a creasing tool you can run the back of your thumb nail over the creases to make sure they’re nice and sharp.

Ready? Let’s fold!

  • If you’re using paper with a different pattern/colour on each side, start with the pattern you want to be on the outside facing down.
  • With the inner side of the paper facing you, set the paper square ready for folding.
  • Fold in half from side to side, bringing one edge over to meet the opposite edge.
  • Crease & unfold.
  • Taking one side, fold that edge to meet the centre crease you’ve just made.
  • Do the same with the other side, folding the edge over to meet the centre.
  • Unfold both sides. You should have three evenly spaced vertical creases.
  • Take the top right corner and fold down so the top edge meets the centre crease.
  • Take the top left corner and fold down to meet the left-hand crease.
  • The next step is folding it all up, using the existing creases. Fold the left-hand crease to the center…
  • …then fold from the center crease over to the left…
  • …and lastly, turn the model over, then fold the remaining flap over the back.
  • This is basically the model finished, but we’ll need to fix it together so your stuff doesn’t fall out! So, open it all back up…
  • Run a thin layer of glue along the bottom edge – where the arrow is!
  • Then do the same up the short side edge.
  • Now, just follow the steps to folding it all up, making sure you press firmly where the glue is to secure.
  • You can also use tape to hold it in place – you just have to fold it all up, then cut a piece of tape to fold over the bottom opening and another to tape up the side.
  • You’re done! If you’ve used a roughly 15x15cm square, you should be able to fit 3 or 4 pencils/pens in – but you can easily make bigger or small ones using different sized pieces of paper.
  • These make a really nice way of wrapping stationery to give as a gift.
Categories
Craft Gifts Lunchtime Lusting Origami Tutorial

Gift for Geeks, Origami tutorial & Meet the Maker

Hey! How’ve you all been? Ready for Spring? Me too. I’m not good at small talk, so let’s skip that and go straight to the fun stuff!

If niche gifting is what you’re after, this site has got it covered. Present Indicative describe their site as “Thoughtful gifts for curious people”. Blood vessel embroidery? They’ve got it. Make your own catapult? Why not! Soft toys shaped like microbes? Who knew Amoebas where so cute. Being a music lover, I think one of my favourites is this musical domino set.

Gifts can be tricky, though; and gift cards are great, but can sometimes seem a bit boring to give… so how about making a fancy holder? All you need is a sheet of A4 paper. You can find full instructions here; it’s really simple, just a few basic folds! Add a ribbon if you’re feeling extra fancy. I bet you are. Go on, add a ribbon.

Over on Instagram, the lovely Joanne Hawker runs March Meet The Maker. A chance for makers and creatives to share their stories and find other makers and creatives! So why not pop over to Instagram and give the hashtag a follow? I’ll be joining in over on my Instagram account and sharing to Facebook too. 

Categories
Craft General Origami Paper Tutorial

Origami gift card holder – step by step tutorial

Why not fancy up a gift card by whipping up one of these simple origami card holders?

All you need is a sheet of A4 paper! After every step, remember to check the fold is neat and then crease firmly. If you don’t have a creasing tool, you can use the back of your thumbnail. Ready?

  • If you’re using paper with a pattern or colour on one side, start with the plain side facing you.
  • Fold in half (from side to side).
  • Crease and unfold.
  • One side at a time, fold the left and right edges in to meet the centre crease, then unfold.
  • Taking each corner in turn, fold in to meet the crease made in the previous step, until all 4 corners are folded.
  • Now fold in the left and right edges in to meet in the middle again.
  • Turn the model over.
  • Fold in half, top to bottom – crease and unfold.
  • Take the bottom and fold up to just past the horizontal crease from the last step.
  • Next, do the same with the top – fold down so it overlaps slightly.
  • Now you should be able to tuck the top bit you’ve just folded down into the bottom bit…
  • And we’re done! A standard gift card should fit into one of the pockets, then you can fold it in half ready for gifting – add a ribbon if you’re feeling extra fancy!
How to make a simple origami gift card holder. Step by step tutorial with pictures.
Categories
Origami Paper Tutorial

Easy Origami Rabbit Tutorial – Step By Step

I chose this for my next tutorial as 2023 is the Chinese year of the rabbit! There are lots of origami bunny tutorials; this is one of the simpler ones.

All you really need is some thin squares of paper and a pair of scissors.

If you make this out of double sided paper, the inside of the ears will be a different colour! Not got any? Use two thin sheets of different colours (that’s what I’ve done here).

Don’t forget to fold neatly and crease firmly – you can press the creases with the back of your thumb nail if you don’t have a creasing tool.
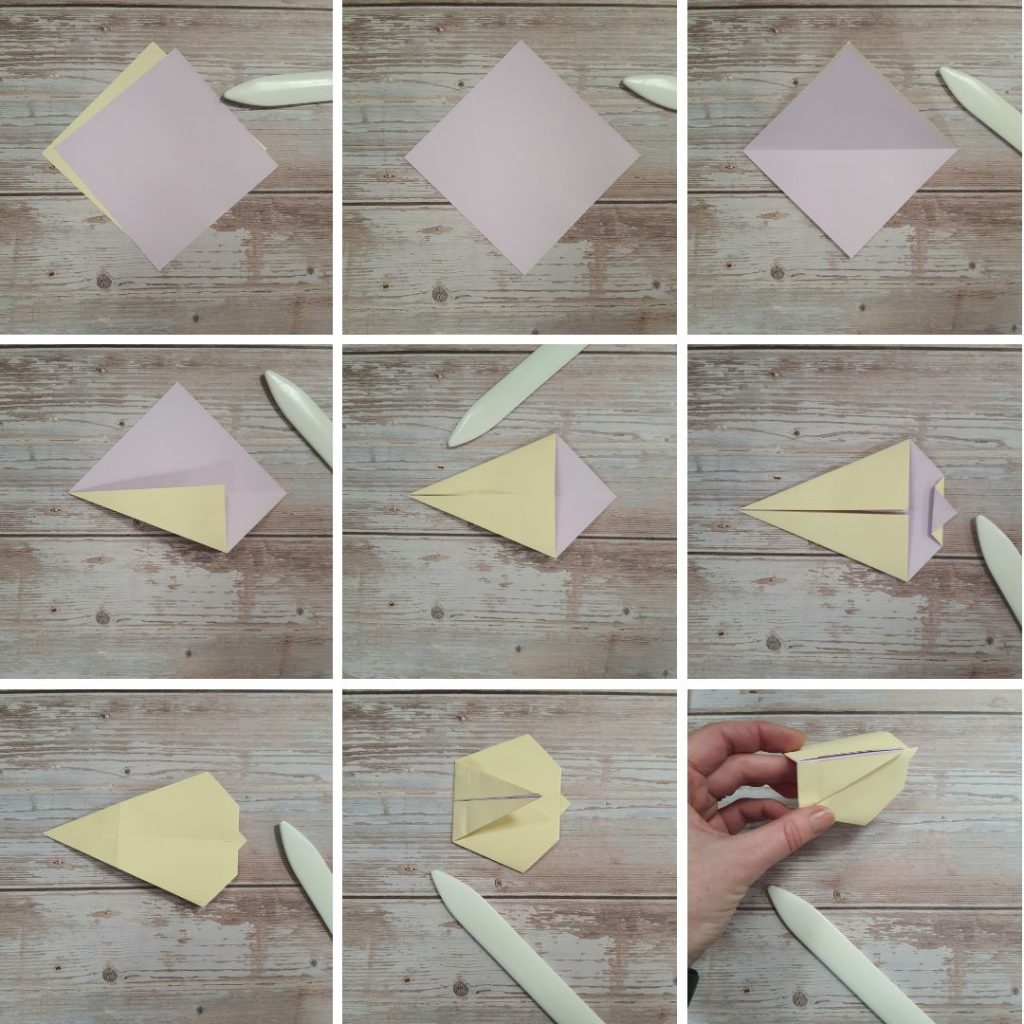
  • If you’re using two-colour paper, start with the colour you want the inside of the ears to be facing upwards.
  • Start with the paper in a diamond shape, with a corner pointing towards you.
  • Fold in half from top point to bottom, crease and unfold.
  • Take the bottom left sloping edge and fold in to meet the centre crease.
  • Do the same with the top left edge.
  • Take the right hand point – fold it back to meet the edge you’ve just made, then fold the tip back the other way so it sticks out over the flat edge a bit (this will be the tail!)
  • Flip the whole thing over.
  • Fold the left hand point over to the right, so it almost meets the flat edge.
  • Next, fold the whole thing in half, bringing the centre crease upwards and the edges down towards each other – it’s easier if you pick it up to do this (see last picture).
  • Now we’re going to make the ears! At the moment, they look like they’re laying along the rabbit’s back.
  • Hold the bottom of the model in one hand and gently bring the points of the ears up with the other.
  • Stop when the back of the ears are roughly perpendicular to the base. Crease well.
  • Ok – so the next step involves separating the ears! Take a pair of scissors and very carefully snip down the centre crease between the ears, being careful not to cut all the way down.
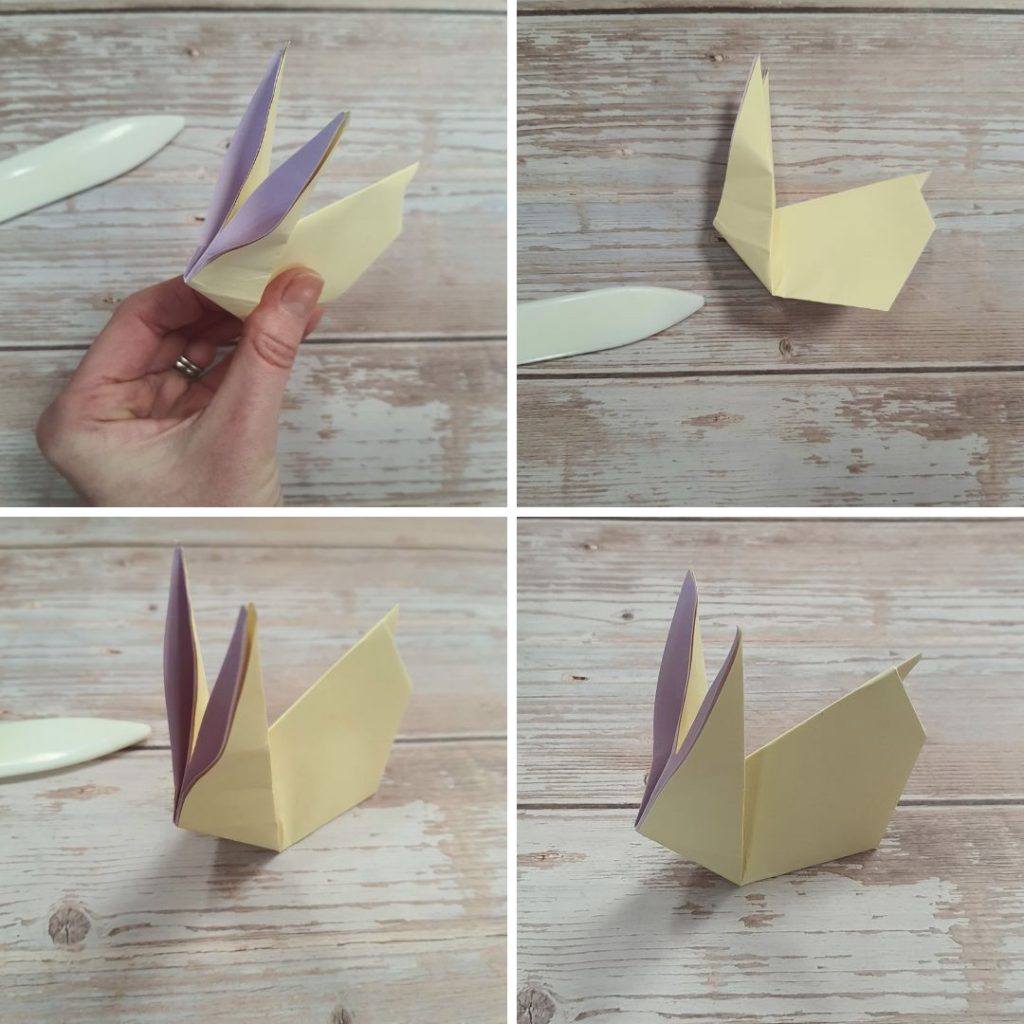
  • To give the ears a bit more shape – stick your finger in them 😂 You can open them out a bit at the bottom, which will show the contrasting paper (if you’ve used it).
  • Lastly, lay the model down and go over all the creases on the body one last time.
  • Bunny is finished! Stand bunny up.
  • 🐇
Categories
General

How to Spot a Stationery Lover: An Illustrated Guide

Are you a stationery lover, or do you know one? If so, I bet some some of these sound familiar! Personally I can relate to all of these.

Categories
Craft Origami Paper Tutorial

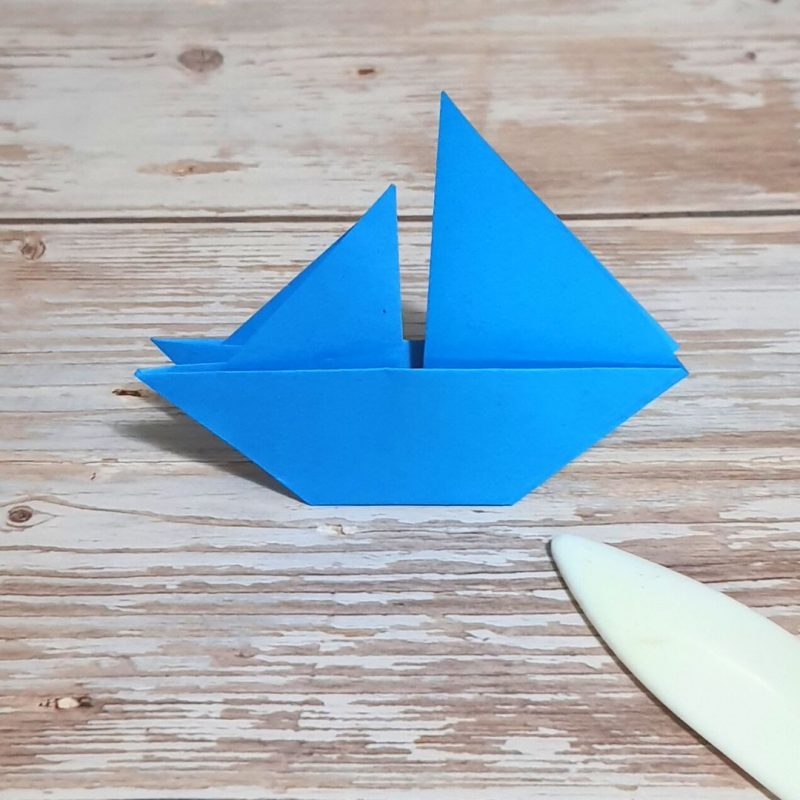
Simple step-by-step origami boat tutorial

This simple origami boat is a fun model to fold. Use a fairly thin square of paper, and remember to fold neatly and crease firmly after each step.

  • Start with your paper square as shown above. If you don’t have a creasing tool, you can use the back of your thumb nail to help crease. We’ll be folding it horizontally then vertically to start with, creating a grid of quarters. Ready?
  • Fold in half from side to side, making sure the edges line up; crease and unfold.
  • Do the same thing, this time folding the other way, to create the horizontal fold; crease and open up fully.
  • You should be left with folds dissecting the paper into neat quarters.
  • Turning the paper 90 degrees, fold the bottom point under and up to meet the top point.
  • The next picture shows how the creases sit.
  • Take the bottom point and fold it up to meet the centre.
  • Do the same with the top point, so they meet in the middle.
  • Next, fold the left point into the centre…
  • …then fold this point back, but instead of folding from the original crease, fold a little way in from that.
  • The next step can be a bit fiddly, but the previous folds will help you out! Pick the model up and press gently in the centre; the middle should go down and the outside edges should come up!
  • Gently press the bottom together to encourage the creases – you’re after a big triangle at the bottom and 2 smaller triangles at the top.
  • Once your model looks right, press and crease all the folds well.
  • Lastly, fold the bottom point back to form the bottom of your boat. If you get it just right, it should stand up by itself!

Hope you enjoyed this model. They look great in different sizes to make a whole fleet.

Don’t forget, you can subscribe to my email list for updates, fun stationery finds, handmade joy and the odd treat!

Categories
Stationery

Writing matters! National Stationery Week ’22

If, like me, the best thing about going back to school was shopping for stationery, then rejoice! May 16th-22nd is National Stationery Week! Yes, really – well, they have National days & weeks for everything, why not stationery? Because stationery is awesome.

My Etsy customers are the best! Reviews like this make my day.
Launched back in 2012 by the Stationery Show, it started life as just a day, gaining momentum and building into a full week. It’s used to celebrate the joys of writing by hand; whether you’re writing in your own notebook, sending someone a letter or postcard, or just a quick note to stick on the fridge.
What’s your style when it comes to stationery? Understated? OTT? Cute & colourful? Plain & simple? I love the fact that you can get stationery in so many different styles to match your mood or personality. 

Making from waste materials means I’m kept on my toes a bit in terms of what I can make in what size, but it means it never gets boring! These pencil cases were made from leather from a furniture samples booklet, and would’ve otherwise been thrown away. Find a selection in my Etsy shop.

Favourite stationery brands

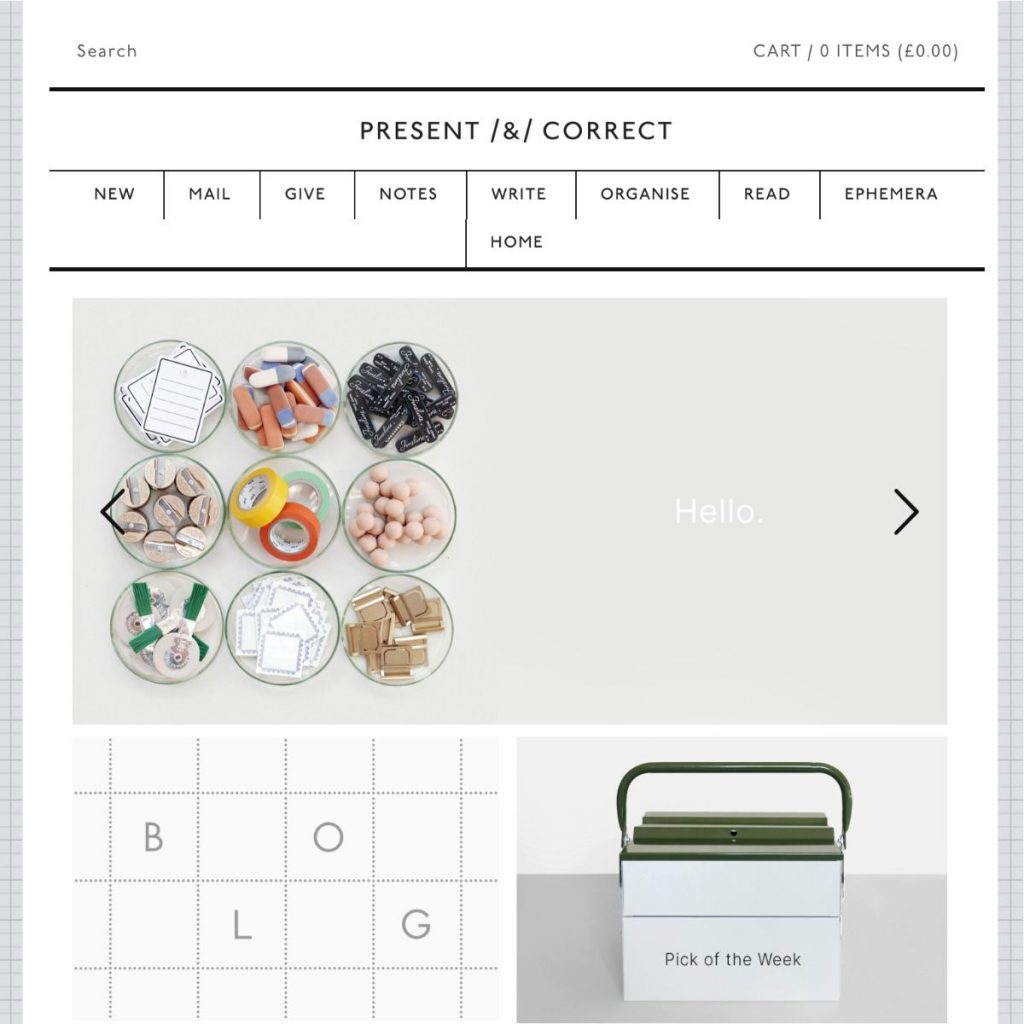
When it comes to looking at stationery shops online, my favourite is Present and Correct. The whole look of their website is just *chef kiss*; every detail is a stationery lover’s dream, down to the graph paper backgrounds. I highly recommend checking out their Ephemera section – all those things you need without really knowing why. They do have a physical store too, in London, though I’m yet to check it out.
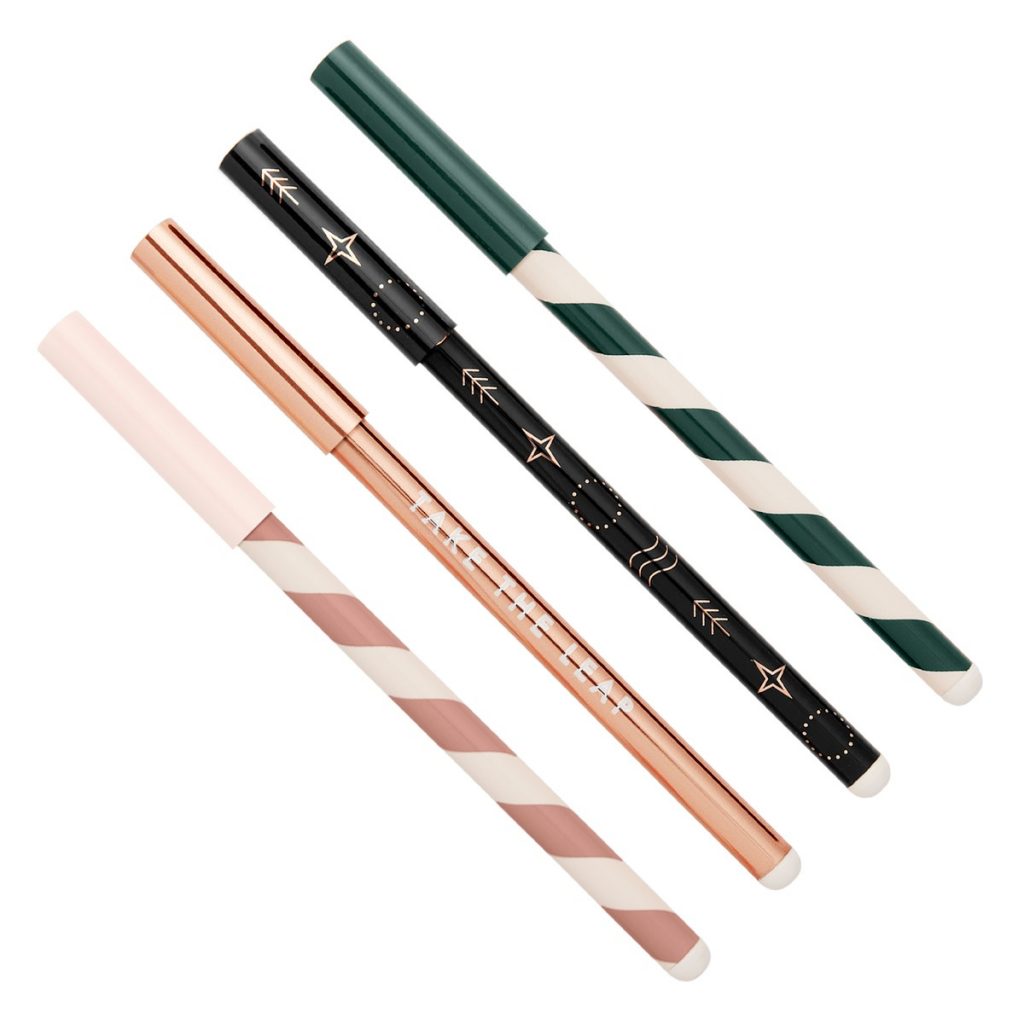
Do you have a favourite pen? I’ve got a set from Kikki.k that I use all time, I love them! Think simple pastel sets and stationery essentials from this Swedish brand. While they currently don’t have UK stores anymore, you can still peruse their online shop for inspiration.

Categories
General

Flame on, Lay it out, Geek it up

Ahoy There!

A warm welcome to followers old and new. I’ve been busy stocking my Etsy shop with lovely rescued leather journals and pencil wraps this month and have created some new labels for my shelf space at The Emporium (a Wellingborough based shop full of handmade awesomeness!) – all my products now have more of a library-esque feel, which I love.
But enough about me; let’s just get down to it, shall we?

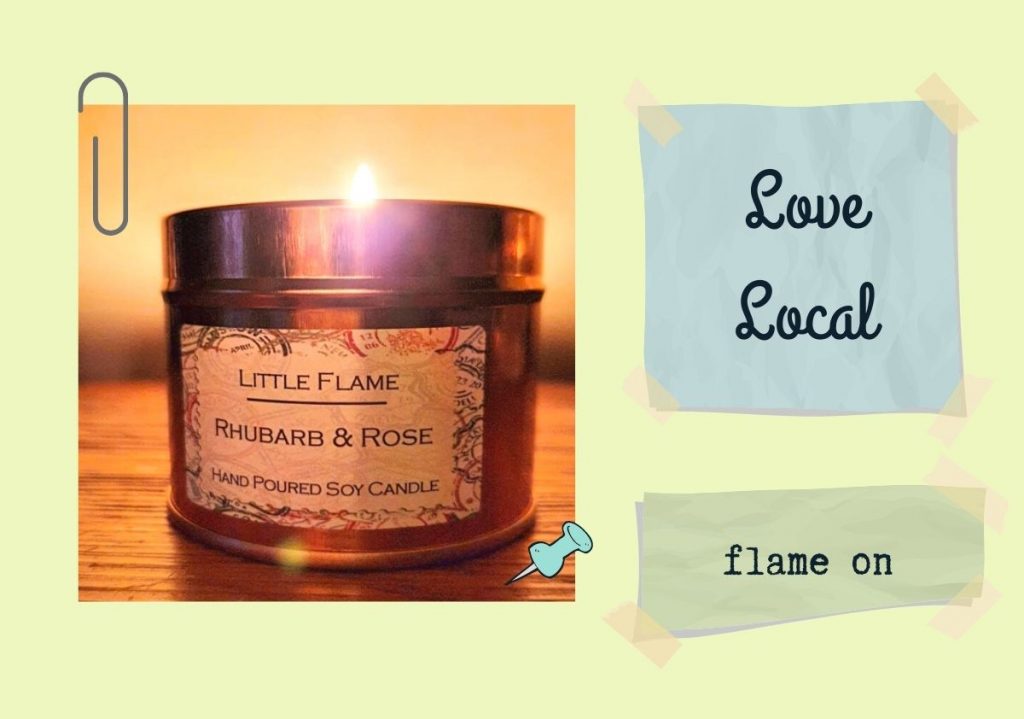
Have you heard of Little Flame candles? Based in Northamptonshire, this small business started to make these hand-poured candles upon retiring. After many months of research and testing, Little Flame was born. Did you know? Soy wax is non-toxic, clean burning and completely free of animal derived substances! Find them on Insta & Facebook and show a new small business some love.

I don’t know about you, but I love a journal with blank pages. It gives you the freedom to do whatever you want; doodle, write, sketch, list, paint… and if you’d like more structure, you can simply add it in yourself. From creating lines, grids, tables and headers, Pinterest (where else?!) has some great ideas to get you going. Prefer video? Here ya go! In the market for a new journal? Check out this selection over in my Etsy shop.

I’m a huge fan of some beautiful creative lettering. But what’s classed as a font and what’s a typeface –  and what’s the difference? Essentially, the Typeface is the base set of characters (e.g. Arial), the font is a particular set within the typeface (e.g. Arial Regular or Arial Rounded). Want more? Nerd yourself out here. Fancy some creative typeface fun? This book is great!

Categories
Books Lunchtime Lusting Stationery Stationery

Planning, Plants & Books

Staying on top of things can be hard work. I love a planner and I love writing lists to help me track things, but I know they’re not for everyone! If you’re looking for something a bit less intense than a physical organiser or planner, how about a digital version? There are some great ones out there to suit different needs. Here are a couple of links; I can also recommend the GoodNotes app if you have an IOS device. 
Digital daily planner 
Weekly digital planner

Outdoor spaces can bring us joy, but during winter it can be hard to get that greenery in, whether you’ve got a garden or not. Having plants indoors can be beneficial to the air as well as your mental well-being. Here are some great plants that will thrive in your home during the winter months.

What have you been reading in the past year? Any stand-out favourites? I’m signed up to Goodreads, so I log what I’m reading and can then take a look back at the books I’ve read over the year. I’m in a couple of (virtual!) book clubs and it’s really nice to read things I wouldn’t normally pick for myself. However, my favourites from 2021 are firmly in my comfort zone! 

Between Two Thorns – Emma Newman. As a fantasy fan, I fell easily into the idea of Emma’s Split Worlds. It’s intriguing right from the start and really keeps your attention throughout. Set in (pretty much) modern day, it flits between our world and a secret mirrored world, where immortal Fae hold power.
Uprooted – Naomi Novik. Yep, it’s more fantasy! The setting is more traditional; think fairy tales and folklore, a simple village by some dark woods and tales of the local dragon…

Want to sign up to my email list?