Categories
Lunchtime Lusting

Lunchtime Lusting- Twinings Floral Melts

Mmm! Tea. Chocolate. Two of the best things ever. Twinings have just brought of these Floral Melt Chocolate Discs. They go with their equally exciting range of floral teas.

Tea and chocolates alike come in different flavours: Orange Blossom, Natural Jasmine, Mulled Spice, Rose and Natural Lavender. They sound delicious and also look pretty too, don’t you think? I may have to dabble in edible petals for my truffles, methinks. I’m fairly sure I saw edible rose petals and the like last time I was in St Giles Cheese (seriously awesome shop in Northampton).

The Twinings floral teas also happen to come in super pretty tins. Pretty pretty. I think that may be the word of the week! Check out the Mulled Spice tin to get you in the Christmas spirit (oh come on, it’s practically November now. Totally allowed).

Pret-ty!

Categories
Art Craft Inspiration

Weekly Inspiration- Anissa Lee: Hand Cut Paper Art And Design

It was a blog post on the awesome Rock ‘n’ Roll Bride (yes, I still look at it, even though I am married) that brought the marvels of Anissa Lee to my attention. And ohmygosh I love, love, love what she does.

Check out Paper Wonderland. I think this heart and rose dress is my absolute favourite.

Looking at the site makes me want to just sit and cut things out of paper with scissors or a scalpel. Which is kind of what I do anyway, only usually I’m doing origami or making cards or something. I want to cut out pretty things, like Anissa Lee. Or Rob Ryan.

Sigh! And this hand-cut paper bird card I found on Etsy puts my attempts at cut-out cards to shame…

Categories
General

Weekend baking- The truffle experiment

If you’re making truffles for someone as a gift, it’s probably not the best time to experiment. But that didn’t stop me.

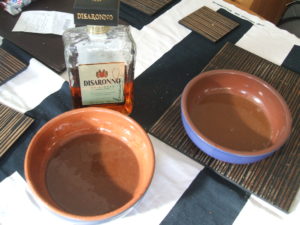
I decided to make two different types; Amaretto centre, with ground almonds on top and plain milk chocolate filled ones decorated with a white swirl.


I put the white swirl in first, as the writing icing I was using was quite soft, and I thought the chocolate might help it set. It didn’t. Lesson learned!

After coating the moulds with melted chocolate, I made the ganache. To do this, I poured 60ml of boiling cream over 75g of well broken up chocolate and mixed frantically until smooth. Then I split the mixture in two and added Disaronno to one half.

I was using Wilton Candy Melts. They’re really easy to use and brilliant for coating and making solid chocolates. However, it turns out that if you try and make a ganache with them, they don’t really solidify. So I ended up making chocolates with almost-liquid centres. Which was unexpected, but really nice.

Results:

Need to practise neatening the edges, but I think they turned out pretty well.

Categories
Craft Inspiration

Weekly Inspiration- Kirstie being back on 4!

Kirstie’s back, hurrah! I have missed having a weekly craft show to watch, I really have.

I loved Kirsty’s Homemade Home. Ooh, and, Kirsty’s Homemade Christmas. And now there’s Kirstie’s Handmade Britain.

Not only are the shows great to watch, the websites linked above are a great resource for crafts/ideas/projects/events/contacts.

So excited am I that next week’s episode is paper crafts, I am actually thinking of blowing off awesome live jazz for £5 at Ronnie Scott’s to watch it.

Categories
Craft Origami

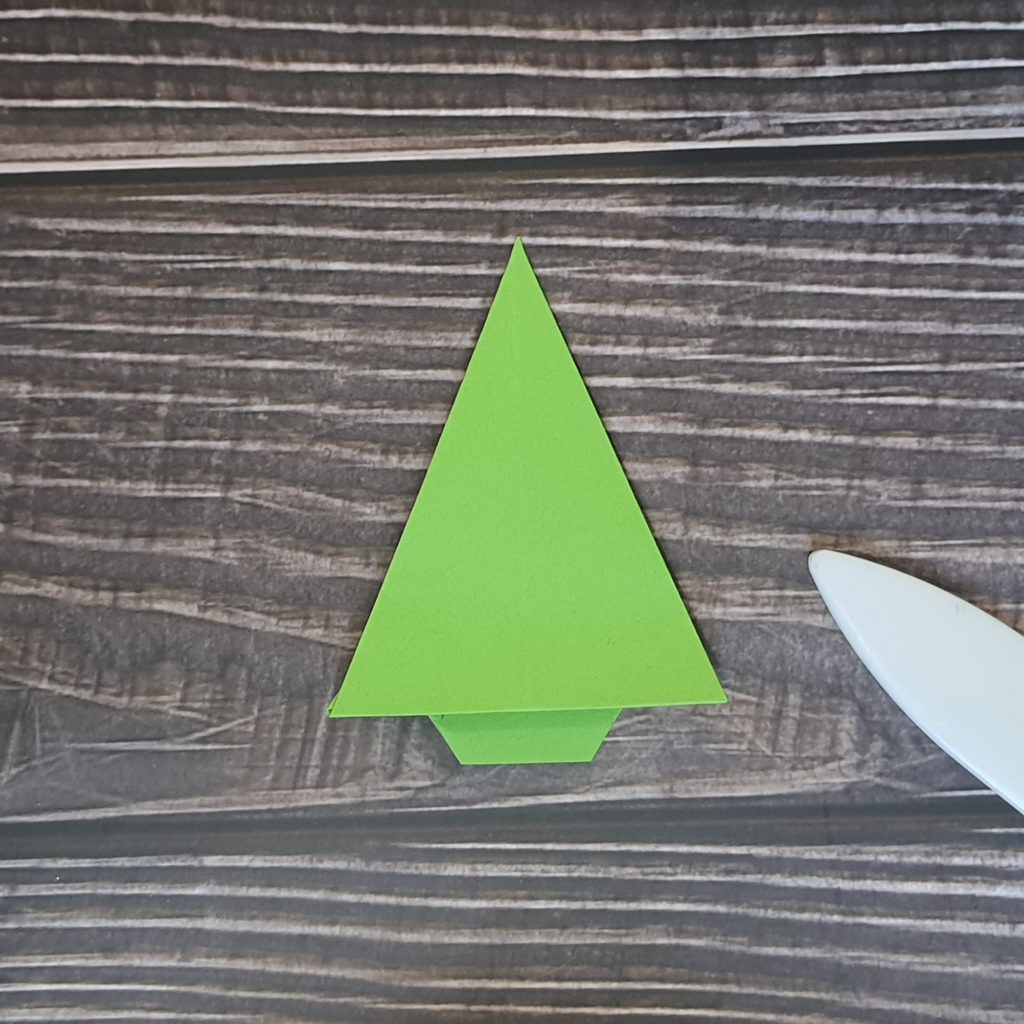
Simple origami Christmas tree tutorial with pictures

These paper trees are incredibly simple and ever so cute. They look great made from patterned or plain paper. Use them to decorate your handmade Xmas cards, or make up some small ones for gift tags.

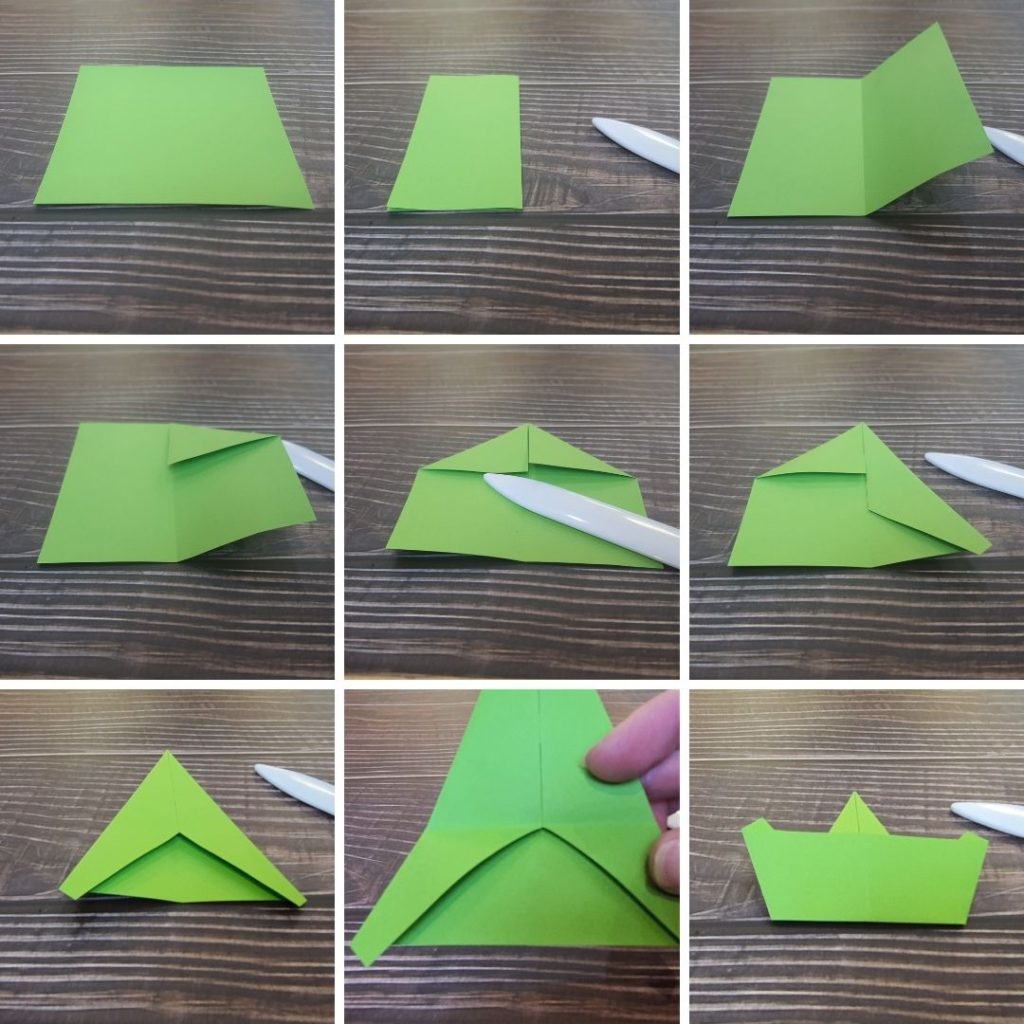
  • Ok, so to start this off, it’s a bit like making a paper plane. Fold the paper in half, side to side, and unfold.
  • Fold the top corners in to the crease you’ve just made, so the tops forms a triangle.
  • Repeat this step, making a narrower triangle at the top.
  • Fold the bottom up, at the point where the bottom of the edges meet (see bottom middle pic).
  • Unfold.
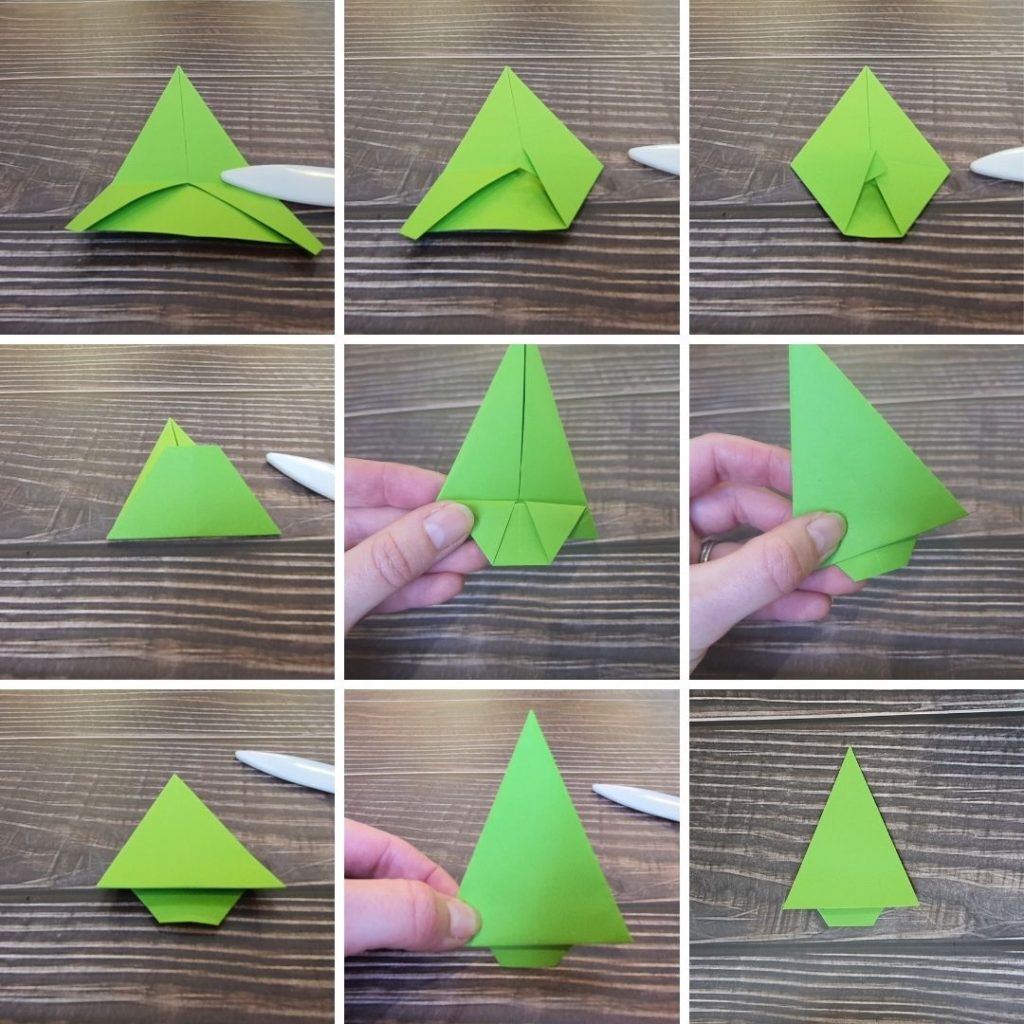
  • Fold each of the bottom points up to meet the crease you made in the last step.
  • Fold this bottom section up again, along the existing crease.
  • This next and final step creates the ‘trunk’ of the tree – take the section you’ve just folded up and fold the top part of it down.
  • Turn the model over so you can see how much you’d like it to stick out from the bottom of the triangle.
  • You may find it doesn’t lay quite flat, so use a dab of glue to secure if you’re going to be using this in other crafts.

Categories
Craft

Knitting complete!!

I can’t quite believe how long this has taken me to knit. But finally it is finished! It was a very simple pattern; basically, cast on 73 rows, knit 79 rows (ish; I kept losing count..) then start shaping… I can’t remember, it was really easy though. Making the pompom for the top was the most fun!

Categories
Craft

Recent stall

Just a little pic from the recent stall from the charity event the other Saturday. It went well, lots of money raised, some fabulous crafts and some great music.

Categories
Inspiration

Weekly Inspiration- making things to stick on walls

I quite like the idea of sticking things to the walls in my house. Also, I like the idea of being able to get them off again. Happily, I found some handy adhesive things in Paperchase that say they stick to walls and things and come off again. Perfect. £5 for a pack of 50, not too bad.

So, I’m thinking of more up to date versions of ye olde ducks in a row:

Perhaps origami butterflies or birds?